Kizyo
Member
- Local time
- 12:20 AM
- Posts
- 3
- OS
- Windows 11, Ubuntu, Sonoma, Ventura, Catalina, Big Sur
So I was trying to build a hackintosh, but miserably failed and crashed my windows install. So I looked online and found an old post on an ubuntu formum talking about QEMU.
Turns out that emulating macOS is so simple.
1) Make sure that Windows Subsystem for Linux and Virtual machine platform are enabled.
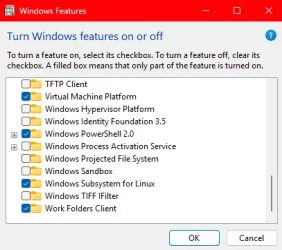
2) Go into the BIOS and check that SVM mode is on (should be in cpu advanced)
3) Open microsoft store and install Ubuntu. (Don't worry it's free)
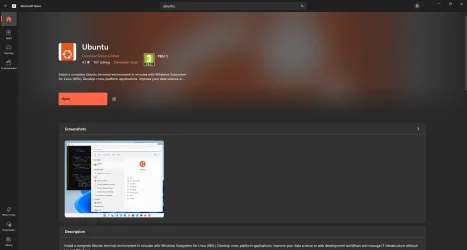
4) Open Ubuntu and wait for install to complete. If it says fatal error, you may need to update your WSL.
5) Create a user. It does NOT need to match the WIndows one.
6) Type or copy :
sudo apt-get update && sudo apt-get install qemu-system qemu-system-x86 uml-utilities virt-manager git wget libguestfs-tools p7zip-full make dmg2img tesseract-ocr tesseract-ocr-eng genisoimage vim net-tools screen -y
(It may take a while)
7) Enter this GitHub repo :
cd ~
git clone --depth 1 --recursive GitHub - kholia/OSX-KVM: Run macOS on QEMU/KVM. With OpenCore + Monterey + Ventura + Sonoma support now! Only commercial (paid) support is available now to avoid spammy issues. No Mac system is required.
cd OSX-KVM
8) Then :
sudo modprobe kvm; echo 1 | sudo tee /sys/module/kvm/parameters/ignore_msrs
9) Then :
For Intel Bois :
sudo cp kvm.conf /etc/modprobe.d/kvm.conf
For AMD Champs :
sudo cp kvm_amd.conf /etc/modprobe.d/kvm.conf
(Basicaly makes sure that it saves the disk properly)
10) Then :
sudo usermod -aG kvm $(whoami)
sudo usermod -aG libvirt $(whoami)
sudo usermod -aG input $(whoami)
(Don't know what the hell this is but it doesn't work without it)
11) After that :
./fetch-macOS-v2.py
Select BIG SUR, because even tho it's not the recommended OS, Big Sur runs so much smoother and boots way faster. (Ventura is slow ass)
12) When that's done :
dmg2img -i BaseSystem.dmg BaseSystem.img
It converts the dmg file to an installation image.
13) Next you need to create a 256 GB VIRTUAL hardrive ( you do not need that much free space !)
14) After that :
sudo ./OpenCore-Boot.sh
(This opens QEMU and starts the machine)
15) Select the already selected disk, and WAIT.
16) When you see the recovery screen, select Disk Utility.
If your mouse doesn't work, sorry bro : (
17) Select the 256 GB SSD, not the smol one ok ?
18) Click on erase and select AFPS format and name it macOS
19) After it's done, close the disk manager, and click on reinstall macOS;.
Select macOS drive and WAIT for an hour or two. (depens on your system)

Whatever it does, DO NOT TOUCH ANYTHING !
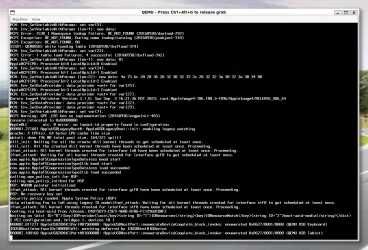
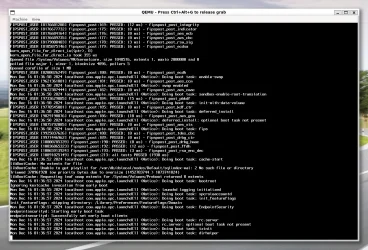
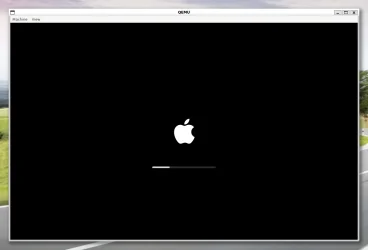
20) Done. You can know configure macOS at your liking. (Just note that mics and sound does not work because of outdated tools, also the resolution is set to 720p max)
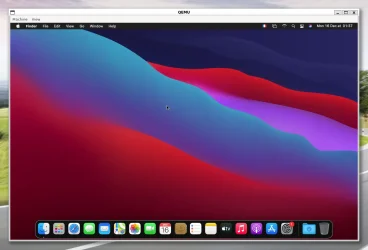
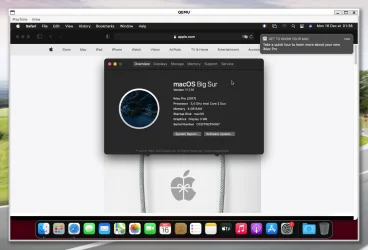
Extra step : if you wan't to re launch the machine :
Open Ubuntu, type :
cd OSX-KVM
and then :
sudo ./OpenCore-Boot.sh
then select macOS.
Turns out that emulating macOS is so simple.
1) Make sure that Windows Subsystem for Linux and Virtual machine platform are enabled.

2) Go into the BIOS and check that SVM mode is on (should be in cpu advanced)
3) Open microsoft store and install Ubuntu. (Don't worry it's free)

4) Open Ubuntu and wait for install to complete. If it says fatal error, you may need to update your WSL.
5) Create a user. It does NOT need to match the WIndows one.
6) Type or copy :
sudo apt-get update && sudo apt-get install qemu-system qemu-system-x86 uml-utilities virt-manager git wget libguestfs-tools p7zip-full make dmg2img tesseract-ocr tesseract-ocr-eng genisoimage vim net-tools screen -y
(It may take a while)
7) Enter this GitHub repo :
cd ~
git clone --depth 1 --recursive GitHub - kholia/OSX-KVM: Run macOS on QEMU/KVM. With OpenCore + Monterey + Ventura + Sonoma support now! Only commercial (paid) support is available now to avoid spammy issues. No Mac system is required.
cd OSX-KVM
8) Then :
sudo modprobe kvm; echo 1 | sudo tee /sys/module/kvm/parameters/ignore_msrs
9) Then :
For Intel Bois :
sudo cp kvm.conf /etc/modprobe.d/kvm.conf
For AMD Champs :
sudo cp kvm_amd.conf /etc/modprobe.d/kvm.conf
(Basicaly makes sure that it saves the disk properly)
10) Then :
sudo usermod -aG kvm $(whoami)
sudo usermod -aG libvirt $(whoami)
sudo usermod -aG input $(whoami)
(Don't know what the hell this is but it doesn't work without it)
11) After that :
./fetch-macOS-v2.py
Select BIG SUR, because even tho it's not the recommended OS, Big Sur runs so much smoother and boots way faster. (Ventura is slow ass)
12) When that's done :
dmg2img -i BaseSystem.dmg BaseSystem.img
It converts the dmg file to an installation image.
13) Next you need to create a 256 GB VIRTUAL hardrive ( you do not need that much free space !)
14) After that :
sudo ./OpenCore-Boot.sh
(This opens QEMU and starts the machine)
15) Select the already selected disk, and WAIT.
16) When you see the recovery screen, select Disk Utility.
If your mouse doesn't work, sorry bro : (
17) Select the 256 GB SSD, not the smol one ok ?
18) Click on erase and select AFPS format and name it macOS
19) After it's done, close the disk manager, and click on reinstall macOS;.
Select macOS drive and WAIT for an hour or two. (depens on your system)

Whatever it does, DO NOT TOUCH ANYTHING !


20) Done. You can know configure macOS at your liking. (Just note that mics and sound does not work because of outdated tools, also the resolution is set to 720p max)


Extra step : if you wan't to re launch the machine :
Open Ubuntu, type :
cd OSX-KVM
and then :
sudo ./OpenCore-Boot.sh
then select macOS.
- Windows Build/Version
- Windows 11 Pro 24H2 OS Build 26100.2605
My Computer
System One
-
- OS
- Windows 11, Ubuntu, Sonoma, Ventura, Catalina, Big Sur
- Computer type
- PC/Desktop
- Manufacturer/Model
- Custom
- CPU
- Ryzen 5600G (spare r5 2600 cus the other is kapput)
- Motherboard
- B550 M DSH3
- Memory
- 16GB PREDATOR
- Graphics Card(s)
- RX 6650
- Sound Card
- N/A (Default one)
- Monitor(s) Displays
- M 1 : Acer 100hz random M 2 : SAMSUNG 75hz SBidk what
- Screen Resolution
- 1080P
- Hard Drives
- 2 SSD 1To, 220 GB
- PSU
- 650 bequiet
- Case
- Master Cooler 500
- Cooling
- 6 fractal fans
- Keyboard
- logitech mechanical keyboard
- Mouse
- logitech
- Internet Speed
- 600Mbps (77 Mega bytes ps)
- Browser
- Chrome / Safari / Firefox (foodle Edge)
- Antivirus
- Windows does the job.
- Other Info
- G29 simrig


