I just tried ALL of the below options with Windows 11 Pro, 22621.2506 and each and every one of them work fine. In addition I tried the answer file that I noted earlier and that also works.
If you have a network connection
If your system has a network adapter such as WiFi or Ethernet, then you should perform
ANY ONE of the four options below. You may want to read all options before choosing.
1) During installation of Windows 11, you will be presented a screen that says "Let's add your Microsoft account". At this screen, enter a fake e-mail address. Note that not every fake address will work. Try using the address "
fake@fake.com". On the next screen you will be asked for a password. Enter any fake password and then click on "Sign in". On the next screen the message "Oops, something went wrong" will be displayed. Click on "Next". On the next screen you will be able to enter a local account name. Do this and proceed with installation.
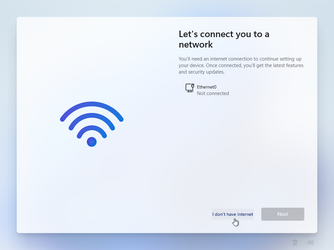
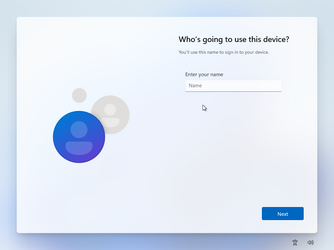
2) If you have an Ethernet cable and no WiFi, unplug the cable. If your system has WiFi use one of the other options. After unplugging the cable, press SHIFT + F10 to open a command prompt. At the command prompt, type "OOBE\BypassNRO" and then press ENTER. The system will reboot. When you get to the "Let's connect you to a network" screen, you will have an option to select "I don't have internet". Choose that option. On the next screen, select "Continue with limited setup". Enter your local user account name, and then continue with setup as usual.
3) During installation, Windows will reboot. After a period of time you will be presented a screen asking "Is this the right country or region?". At that screen, press SHIFT + F10 to open a command prompt. At the command prompt, type "OOBE\BypassNRO" and then press ENTER. The system will reboot. After the reboot, you will again arrive at the screen that asks "Is this the right country or region?". Once again, press SHIFT + F10 to open a command prompt. Run the command "ipconfig /release" and press ENTER. Close the command prompt and proceed with setup. When you get to the screen that says "Let's connect you to a network" select "I don't have internet". On the next screen, select "Continue with limited setup". Continue the installation as normal.
4) Proceed with installation of Windows until you arrive at a screen where you have a choice to "Set up for personal use" or "Set up for work or school", select "Set up for work or school" and click on "Next".
On the next screen, select "Sign-in options", then "Domain join instead". Don't worry, we are not joining a domain!
On the next screen, supply the local username that you want to create and then continue through setup as normal.
If you do NOT have an Internet connection
During installation, Windows will reboot. After a period of time, you will be presented a screen asking, "Is this the right country or region?". At that screen, press SHIFT + F10 to open a command prompt. At the command prompt, type "OOBE\BypassNRO" and then press ENTER. The system will reboot. When you get to the "Let's connect you to a network" screen, you will have an option to select "I don't have internet". Choose that option. On the next screen, select "Continue with limited setup". Enter your local user account name, and then continue with setup as usual.


