This tutorial will show you how to move or restore the default location of the OneDrive folder for your account in Windows 10 and Windows 11.
With OneDrive in Windows, you can sync files and folders between your computer and the cloud, so you can get to your files from anywhere - your computer, your mobile device, and even through the OneDrive website at OneDrive.com. If you add, change, or delete a file or folder in your OneDrive folder, the file or folder is added, changed, or deleted on the OneDrive website and vice versa. You can work with your synced files directly in File Explorer and access your files even when you’re offline. Whenever you’re online, any changes that you or others make will sync automatically.
If you like, you can move the OneDrive folder and its content to a location you want it at instead of the default location in your user profile (%UserProfile%) folder.
Reference:
Change the location of your OneDrive folder - Microsoft Support
Learn how to change the location of your OneDrive folder.
 support.microsoft.com
Here's How:
1 Open OneDrive.
2 Click/tap on the OneDrive notification icon on the taskbar. (see screenshot below step 3)
3 Click/tap on Help & Settings (gear) button, and click/tap on Settings. (see screenshot below)
4 Click/tap on the Account tab, and click/tap on the Unlink this PC link. (see screenshots below)
5 Click/tap on Unlink account to confirm. (see screenshot below)
The Set up OneDrive screen will appear (step 10); ignore it for now, but don't close it.
6 Open File Explorer, and navigate to your current OneDrive folder location (ex: "C:\Users\Brink\OneDrive").
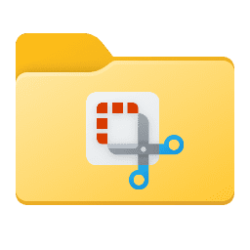
7 Select the OneDrive folder, and click/tap on the Cut (Ctrl+X) icon on the command bar. (see screenshot below)
8 Navigate to where (ex: "D") you want to move the OneDrive folder, and Paste (Ctrl+V) the OneDrive folder from step 7 to move it here. (see screenshot below)
9 You can now close File Explorer.
10 In the Set up OneDrive screen, Enter your email address for your Microsoft account, or you work or school account, and click/tap on Sign in. (see screenshot below)
11 Enter the password for your Microsoft account, and click/tap on Sign in. (see screenshot below)
12 If you turned on two-step verification for your Microsoft account, select how (ex: text) you want to receive a code, fill out any other required information, and click/tap on Send code. (see screenshots below)
A) Enter the code you received from Microsoft, and click/tap on Verify. (see screenshot below)
13 Click/tap on the Change location link. (see screenshot below)
14 Navigate to and select the OneDrive folder where you moved it at step 8, and click/tap on Select Folder. (see screenshot below)
15 Click/tap on Use this folder location. (see screenshot below)
16 Click/tap on Next. (see screenshot below)
17 Perform one of the following actions below depending on if you want to back up your folders to OneDrive or not: (see screenshots below)
- Select the folders you want to backup, and click/tap on Continue.
- Unselect all folders, and click/tap on Skip.
- (New) Turn on or off folders.
18 If prompted, click/tap on Not now. (see screenshot below)
19 If prompted, click/tap on Next. (see screenshots below)
20 If prompted, click/tap on Later. (see screenshot below)
21 Click/tap on Next. (see screenshot below)
22 Your OneDrive folder will now open at its new location. (see screenshot below)
That's it,
Shawn Brink
Related Tutorials
- Enable or Disable OneDrive in Windows 11
- Set up OneDrive in Windows 11
- Move or Restore Default Location of Desktop Folder in Windows 11
- Move or Restore Default Location of Documents Folder in Windows 11
- Move or Restore Default Location of Downloads Folder in Windows 11
- Move or Restore Default Location of Music Folder in Windows 11
- Move or Restore Default Location of Pictures Folder in Windows 11
- Move or Restore Default Location of Saved Games Folder in Windows 11
- Move or Restore Default Location of Searches Folder in Windows 11
- Move or Restore Default Location of Videos Folder in Windows 11
Last edited:
")