This tutorial will show you how to uninstall or reinstall the Recall feature for all users in Windows 11 on Copilot+ PCs.
Starting with Windows 11 build 26120.2415 (Dev) and build 26100.3902 (RP) on Snapdragon-powered Copilot+ PCs, you can try out the Recall (Preview) feature.
Starting with Windows 11 build 26120.2510 (Dev), Microsoft is expanding the preview of Recall to Windows Insiders on AMD and Intel-powered Copilot+ PCs.
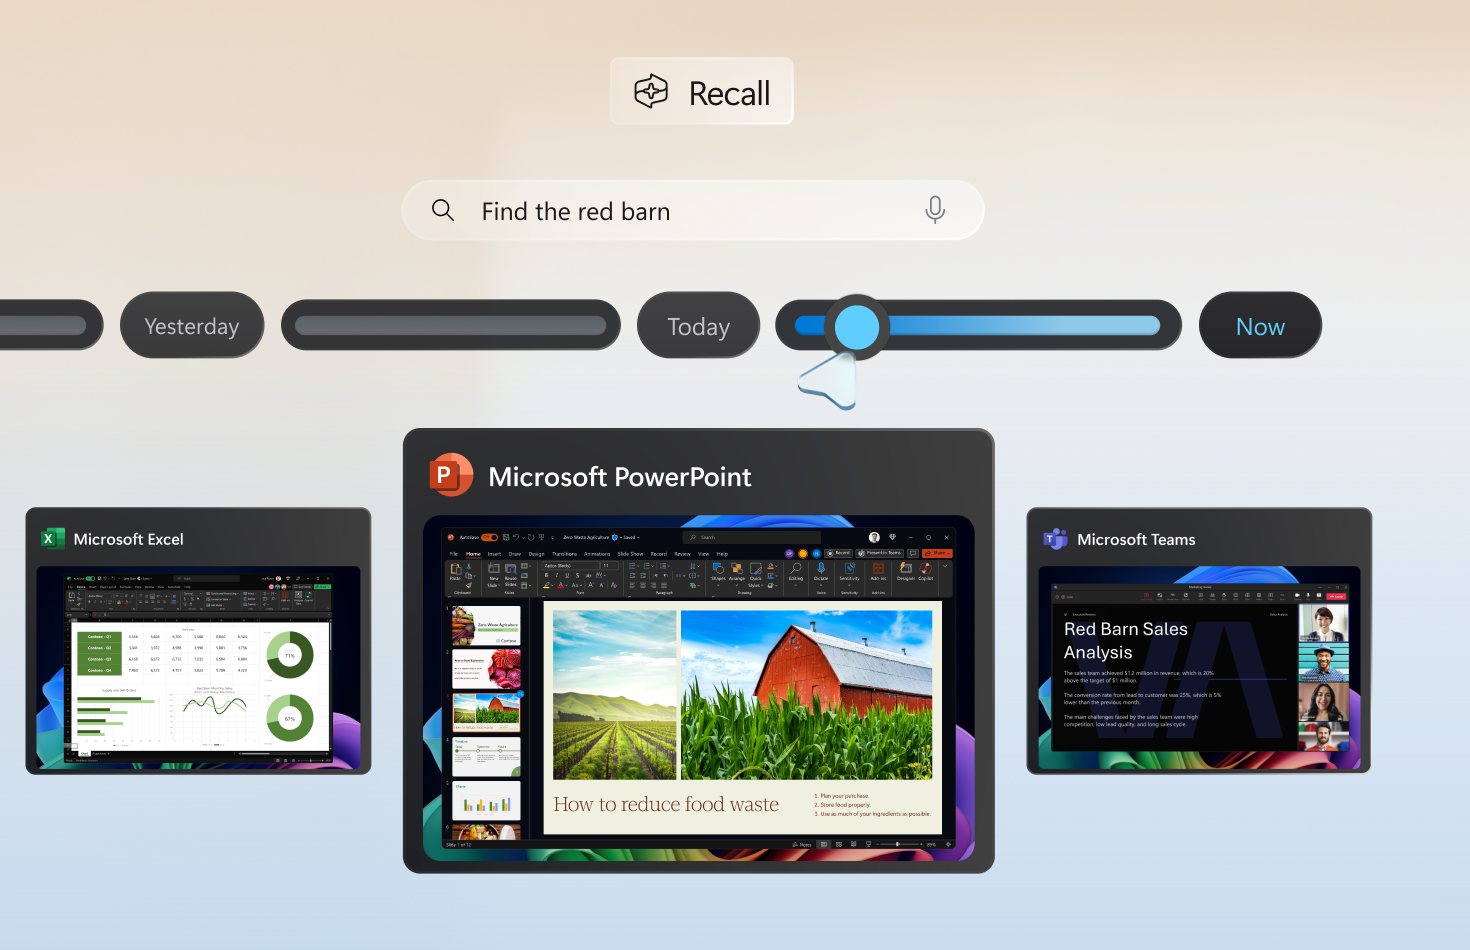
Recall was introduced earlier this year, with the ability to enable you to quickly find and jump back into what you have seen before on your PC. You can use an explorable timeline to find the content you remember seeing before. You can also use semantic powered search and just describe how you remember something and Recall will retrieve the moment you saw it. Any photo, link, or message can be a fresh point to continue from.
To use Recall you need to opt in to saving snapshots, which are screenshots of your activity. Snapshots and the contextual information derived from them are saved and encrypted to your local hard drive. Recall does not share snapshots or associated data with Microsoft or third parties, nor is it shared between different Windows users on the same device. Windows will ask for your permission before saving snapshots. You are always in control, and you can delete snapshots, pause or turn them off at any time. Any future options for the user to share data will require fully informed explicit action by the user.
If you opt in to the feature, then as you use your PC, a snapshot of your active screen will be saved every few seconds and when the content of your active window changes. Snapshots are also protected with Windows Hello, so that you are the only signed in user can access Recall content. Recall allows you to search for content, including both images and text, using the clues you remember. Trying to remember the name of the sustainable restaurant you saw last week? Just ask Recall and it retrieves both text and visual matches for your search, automatically sorted by how closely the results match your search. Recall can even jump back into the content you saw.
To help maintain your privacy, Recall processes your content locally on the Copilot+ PC and securely stores it only on your device. Snapshots are encrypted by Device Encryption or BitLocker, which are enabled by default on Windows 11. Recall doesn't share snapshots with other users that are signed into Windows on the same device. Microsoft can't access or view the snapshots.
You're always in control of what's saved as a snapshot. You can disable saving snapshots, pause temporarily, filter apps and websites, and delete your snapshots at any time.
You can choose how long snapshots can be saved on your device. In the Maximum storage duration for snapshots setting, select either 30, 60, 90, 180 days, or unlimited. Once snapshots reach the age limit, they are deleted from the device. If you don’t set the maximum storage duration, then snapshots aren’t deleted until the Maximum storage for snapshots limit is reached, and then the oldest snapshots are deleted first.
Your PC needs the following minimum system requirements for Recall:
- A Copilot+ PC that meets the Secured-core standard
- 40 TOPs NPU (neural processing unit)
- 16 GB RAM
- 8 logical processors
- 256 GB storage capacity
- To enable Recall, you’ll need at least 50 GB of storage space free
- Saving snapshots automatically pauses once the device has less than 25 GB of storage space
- Users need to enable Device Encryption or BitLocker
- Users need to enroll into Windows Hello Enhanced Sign-in Security with at least one biometric sign-in option enabled in order to authenticate

Recall overview
Learn how to use the AI-assisted Recall feature with the User Activity API in Windows.
learn.microsoft.com
Retrace your steps with Recall - Microsoft Support
 support.microsoft.com
Manage Recall for Windows clients
Learn how to manage Recall for commercial environments and about Recall features.
learn.microsoft.com
Privacy and control over your Recall experience - Microsoft Support
support.microsoft.com

Update on Recall security and privacy architecture
Overview As AI becomes more integral to Windows, Microsoft is doing more with AI on the edge with the power of a 40+ TOPS Neural Processing Unit on Copilot+ PCs. This enables lower latency, better battery life for AI intense tasks, use of AI
Update on the Recall preview feature for Copilot+ PCs
Update Oct. 31, 2024: We are committed to delivering a secure and trusted experience with Recall. We recently shared updates to the security and privacy architecture for Recall in a
You must be signed in as an administrator to add (reinstall) and remove (uninstall) the Recall feature.
Recall (Preview) will begin to rollout on Snapdragon-powered Copilot+ PCs, with support for AMD and Intel-powered Copilot+ PCs coming soon. As we gradually roll out Recall in preview, Recall is supported on select languages including Chinese (simplified), English, French, German, Japanese, and Spanish. Content-based and storage limitations apply. See here for more details. Recall is not yet available in all regions, with expanded availability coming over time.
Contents
- Option One: Uninstall or Reinstall Recall in Windows Features
- Option Two: Uninstall or Reinstall Recall using DISM Command
- Option Three: Uninstall or Reinstall Recall using "Enable/Disable-WindowsOptionalFeature" Command
EXAMPLE Recall on Copilot+ PC
1 Open Windows Features (OptionalFeatures.exe).
2 Check (install - default) and uncheck (uninstall) Recall for what you want, and click/tap on OK. (see screenshot below)
If Windows Features is empty or blank, then double check to make sure that the Windows Modules Installer service is enabled and set to Automatic.
3 Click/tap on Close when "Windows completed the requested changes". (see screenshot below)
1 Open Windows Terminal (Admin), and select Windows PowerShell or Command Prompt.
2 Copy and paste the command you want to use below into Windows Terminal (Admin), and press Enter. (see screenshots below)
(Install Recall feature - default)
DISM /Online /Enable-Feature /FeatureName:"Recall"OR
(Uninstall Recall feature)
DISM /Online /Disable-Feature /FeatureName:"Recall"1 Open Windows Terminal (Admin), and select Windows PowerShell.
2 Copy and paste the command you want to use below into Windows Terminal (Admin), and press Enter. (see screenshots below)
(Install Recall feature - default)
Enable-WindowsOptionalFeature -Online -FeatureName "Recall"OR
(Uninstall Recall feature)
Disable-WindowsOptionalFeature -Online -FeatureName "Recall"That's it,
Shawn Brink
Related Tutorials
- Add or Remove Optional Features in Windows 11
- Enable or Disable Recall Feature in Windows 11
- Enable or Disable Save Screenshots of Sites for History in Microsoft Edge
- Enable or Disable Recall Snapshots in Windows 11
- Open Recall in Windows 11
- Use Recall with Snapshots in Windows 11
- Use Click to Do in Recall in Windows 11
- Turn On or Off Click to Do in Recall in Windows 11
- See Storage Space Used by Recall Snapshots in Windows 11
- Change Maximum Storage Size for Recall Snapshots in Windows 11
- Change Maximum Storage Duration for Recall Snapshots in Windows 11
- Pause or Resume Recall Snapshots in Windows 11
- Delete Recall Snapshots in Windows 11
- Exclude a Website from Recall Snapshots in Windows 11
- Exclude an App from Recall Snapshots in Windows 11
- Enable or Disable Filter Sensitive Information on Recall Snapshots in Windows 11
- Enable or Disable Help Improve Recall Snapshots Filtering in Windows 11
Last edited:


")