- Local time
- 11:18 PM
- Posts
- 3,401
- OS
- Windows 11 Pro
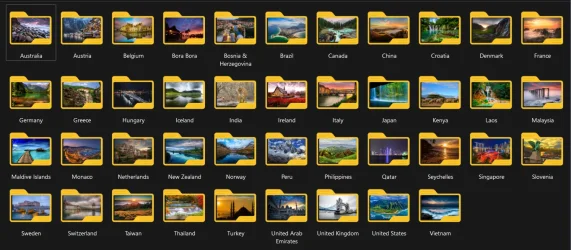
For anyone that is interested in having their folders look like this (i believe it looks much more appealing for photo directories, etc):

here is how to accomplish it:
Download the attached Folder_Glass_Custom.zip file on this tutorial and save it. Extract it and move the .ico file to a known location (I will use "C:\CustomIcons" in this tutorial)
Download the attached Clear_icon_cache.zip and save it. Extract it anywhere you would like
1. Get CustomizerGod
 www.door2windows.com
2. Browse to
"C:\Windows\System32\" and COPY imageres.dll to Desktop
3. Rename the imageres.dll to pnidui.dll and MOVE pnidui.dll back to "C:\Windows\System32\"
4. Go to "C:\Windows\SystemResources\" and COPY imageres.dll.mun to Desktop
5. Go to "C:\Windows\System32\" and COPY imageres.dll to Desktop
6. Open CustomizerGod, Dismiss the error message, then click the menu button in the lower-right (three horizontal lines)

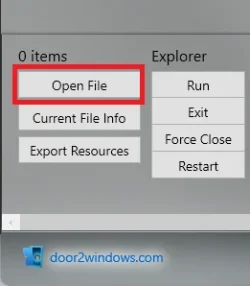
7. Click the Open File button and open the imageres.dll.mun COPY on Desktop (in dropdown - select All Files Types to choose .mun)


8. Scroll down and click imageres.dll.mun - Icons

9. Change both ID: #5 and ID: #6 to custom folder ico (the one in "C:\CustomIcons")

10. Close CustomizerGod
ANNOTATE THE FOLLOWING BEFORE PROCEEDING
11. Restart into Advanced Startup Options (Settings > System > Recovery > Advanced Startup > Restart Now)
12. Choose Troubleshoot > Command Prompt
13. Type the following and press Enter after each command:
11. Continue to Windows
12. Run Clear_icon_cache.bat

here is how to accomplish it:
Download the attached Folder_Glass_Custom.zip file on this tutorial and save it. Extract it and move the .ico file to a known location (I will use "C:\CustomIcons" in this tutorial)
Download the attached Clear_icon_cache.zip and save it. Extract it anywhere you would like
1. Get CustomizerGod
CustomizerGod
CustomizerGod is the ultimate tool for customizing Windows. It lets you customize almost any part of Windows according to your taste. Like if you want the start button to look different, you...
2. Browse to
"C:\Windows\System32\" and COPY imageres.dll to Desktop
3. Rename the imageres.dll to pnidui.dll and MOVE pnidui.dll back to "C:\Windows\System32\"
4. Go to "C:\Windows\SystemResources\" and COPY imageres.dll.mun to Desktop
5. Go to "C:\Windows\System32\" and COPY imageres.dll to Desktop
6. Open CustomizerGod, Dismiss the error message, then click the menu button in the lower-right (three horizontal lines)

7. Click the Open File button and open the imageres.dll.mun COPY on Desktop (in dropdown - select All Files Types to choose .mun)


8. Scroll down and click imageres.dll.mun - Icons

9. Change both ID: #5 and ID: #6 to custom folder ico (the one in "C:\CustomIcons")

10. Close CustomizerGod
ANNOTATE THE FOLLOWING BEFORE PROCEEDING
11. Restart into Advanced Startup Options (Settings > System > Recovery > Advanced Startup > Restart Now)
12. Choose Troubleshoot > Command Prompt
13. Type the following and press Enter after each command:
Code:
C:
Code:
Cd Windows\System32\
Code:
Ren imageres.dll imageres.dll.bak
Code:
Cd..
Code:
Cd SystemRources
Code:
Ren imagres.dll.mun imageres.dll.mun.bak
Code:
Cd..
Code:
Cd..
Code:
Cd CustomIcons
Code:
Copy imageres.dll C:\Windows\System32\imageres.dll
Code:
Copy imageres.dll.mun C:\Windows\SystemResources\imageres.dll.mun
Code:
Exit11. Continue to Windows
12. Run Clear_icon_cache.bat
Attachments
Last edited:
My Computer
System One
-
- OS
- Windows 11 Pro


