I don't want to confuse things at all, but just in case you are interested, here is a procedure for creating a bootable Windows installation flash drive using no third-party tools, batch files, or anything other than running a few commands and copying some files.
I've seen some rare circumstances, such as when a flash drive was configured for GPT, where the media creation tool did not yield a working flash drive. I like this procedure because I have NEVER seen this not work. You will be able to boot it on any system whether that system is BIOS based or UEFI based. In addition, there is no issue with having files that are greater than 4GB in size. I just keep this procedure handy in case I have any difficulties with any other method of creating the boot disk. It may be easier to use Rufus or the Media Creation Tool, but this is still a good reference to keep on hand.
Here is the procedure:
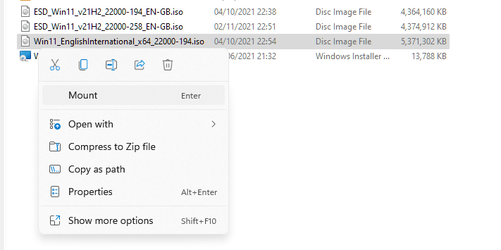
1) Begin by having your Windows ISO image available. Double-click that file. That should "mount" the ISO image. This means that the ISO image is opened and assigned a drive letter, much like inserting a DVD in a drive. Take note of the drive letter that File Explorer shows for the image.
2) Plug in your flash drive if it is not already plugged in.
3) Press WinLogoKey +R, type in "diskpart" (without the quotes), press <ENTER>.
4) From the diskpart> prompt, run this command:
5) From the size of the disks, try to determine which disk your thumb drive is and note the drive number. If that is not enough information, run these commands to get more detail on any disk. In this example, I want more info on disk 4:
Code:
select disk 4
detail disk
Here is some sample output:
Code:
DISKPART> list disk

  Disk ###  Status         Size     Free     Dyn  Gpt
  --------  -------------  -------  -------  ---  ---
  Disk 0    Online          476 GB      0 B        *
  Disk 1    Online         3726 GB      0 B        *
  Disk 2    Online          465 GB  1024 KB        *
  Disk 3    Online         7452 GB      0 B        *
  Disk 4    Online          238 GB      0 B

DISKPART> select disk 4

Disk 4 is now the selected disk.

DISKPART> detail disk

SanDisk Extreme Pro USB Device
Disk ID: DC727760
Type   : USB
Status : Online
Path   : 0
Target : 0
LUN ID : 0
Location Path : UNAVAILABLE
Current Read-only State : No
Read-only  : No
Boot Disk  : No
Pagefile Disk  : No
Hibernation File Disk  : No
Crashdump Disk  : No
Clustered Disk  : No

  Volume ###  Ltr  Label        Fs     Type        Size     Status     Info
  ----------  ---  -----------  -----  ----------  -------  ---------  --------
  Volume 7     Z   My Software  NTFS   Removable    238 GB  Healthy
    C:\MountPoints\My Software\
6) When you determine the correct disk, run the commands below while you are still in diskpart. In this example, I have determined that disk 4 is my flash drive. Be sure to select the correct disk number because everything on that disk will be erased!
Code:
clean
convert mbr
create partition primary size=1000
active
format fs=fat32 label=FLASH1 quick
assign
create partition primary
format fs=ntfs label=FLASH2 quick
assign
exit
NOTE: The assign commands will assign the next available drive letter. If you want to assign specific drives letters, for example E:, use the command "assign letter=E" rather than just "assign" by itself. Please also note that we are assigning the label "FLASH1" to the first partition which is a FAT32 partition, and "FLASH2" to the second partition which is NTFS. The only reason we are doing this is to make these partitions easy to identify when you look at them in File Explorer.
In the next step, we will copy files from the source to the FAT32 and NTFS partitions on the thumb drive. To be clear, all the files and folders that you are being asked to copy come from your ISO image that you mounted in step 1 and you are copying them to either the FAT32 partition (the one labeled "FLASH1") or to the NTFS partition (the one labeled "FLASH2") on your flash drive.
7) Follow these steps to copy files to your thumb drive:
⦁ Copy all files and folders EXCEPT the \sources folder to the FAT32 partition.
⦁ Create a folder called sources on the FAT32 partition.
⦁ Copy the file \sources\boot.wim to the FAT32 partition \sources folder.
⦁ Create a folder called sources on the NTFS partition.
⦁ Copy all files and folders from the \sources folder EXCEPT boot.wim to the \sources folder on the NTFS partition.
At this point, you should have a bootable thumb drive that can be booted from both BIOS and UEFI based systems.
8) To finish, in File Explorer, right click the drive letter for the ISO image that you mounted in step 1 and choose "Eject". This will unmount the image, much like ejecting a DVD from its drive.
NOTE: When booting on some UEFI based systems, you may be presented with an option to boot either the FAT32 or the NTFS partition. Choose the FAT32 partition.


