(open in a new tab & zoom in for better view)
Hi Guys ! -
@ParisBridge &
@CostasChal
No problem, I'm used to change manually system icons.
You'll need
Resource Hacker (portable) or a similar app.
Make sure "Files names extensions" is ticked in your Explorer display.
First you have to
take ownership of the
2 DLL files containing the system icon set.
Since Windows 10 version 1903, these files are located in
C:\Windows\SystemResources instead of
C:\Windows\System32,
and have an extra "
.mun" extension :
imageres.dll.mun
zipfldr.dll.mun
Taking Ownership can easily be done thanks to
an extra context menu command (also in
TenForums),
or else can be done manually :
- Select file, right click and choose [Properties], in the "Security" tab, go to [Advanced].
- At the top of the new window, to the right of "Owner: System", click on [Modify],
then type "users" and press [Enter] key twice, click on [Apply] then [OK] .
- In the "Properties / Security" window, click the [Edit] button .
- In the permissions window, and in the names pane, select [Users (computer-name\Users)], then under "Authorize", check the "Total control" box, and finally confirm with [OK].
Owner permissions are now assigned to you.
> Make a copy of these 2 files in a new folder, that you could name "Fluent Blue DLL" on your Desktop.
Delete the "
.mun" extension of your new copied DLL files.
Run "Resource Hacker" as Administrator.
Go to "File > Open..." ...one of the new copied DLL files.
Open "Icon Group"
Select the icons to replace. (right click > Replace Icon)
> imageres :
3 : Fluent Blue - Default Generic.ico
4 : Fluent Blue - Default Generic.ico
5 : Fluent Blue - Thumbnail. Back.ico
6 : Fluent Blue - Thumbnail. Front.ico
162 : Fluent Blue - With Content.ico
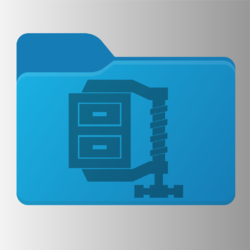
174 : Fluent Blue - Archive.ico
> zipfldr :
101 : Fluent Blue - Archive.ico
123 : Fluent Blue - Archive.ico
Attention : Some Icon Group #numbers may be slightly different, according to the version you are using.
Please make sure the icons to replace are the correct ones.
Save (Ctrl + S).
A "*name*old.dll" will automatically be created as well, in the same location.
Close "Resource Hacker".
> Now add the ".mun" extension to your new DLL files names.
Go back to
C:\Windows\SystemResources to replace these 2 files. (or
C:\Windows\System32 in Windows 10 v.1809)
Careful : The original files will keep running and you will not be able to delete them until the next reboot.
It is important not to close the 2 Explorer windows you are using until the copies are done.
First, rename the 2 original files, simply adding "2" or "Old" at the end, before ".dll.mun"
Now copy your 2 new files.
Restart your computer.
Your new icons are applied.
Go back to C:\Windows\SystemResources and delete the old "****2.dll.mun" files, if you like.
Or else, you can keep them as a backup.
Use the same last procedure to apply the old DLL files, if one day you want you original icons back.