Solved VMware Workstation Pro


@glasskuter
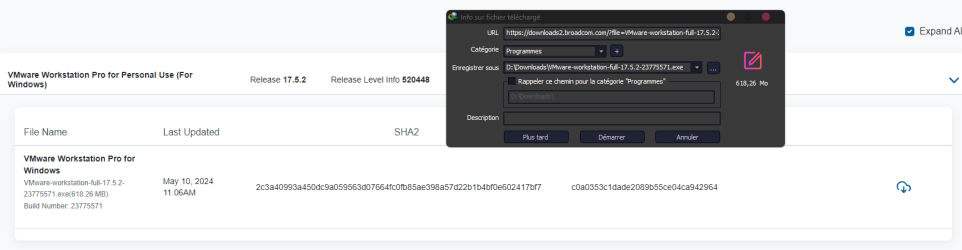
I installed the Pro version right over the Player version pointing to the original installation folder without uninstalling first.
It had no problems uninstalling first then went on to upgrade.
I advise you to choose the option to create a new menu folder as there are several new shortcuts and features added.
 

My Computers

System One System Two

  • OS
    Win11 All /Debian/Arch
    Computer type
    Laptop
    Manufacturer/Model
    ASUSTeK COMPUTER INC. TUF Gaming FX705GM
    CPU
    2.20 gigahertz Intel i7-8750H Hyper-threaded 12 cores
    Motherboard
    ASUSTeK COMPUTER INC. FX705GM 1.0
    Memory
    24428 Megabytes
    Graphics Card(s)
    Intel(R) UHD Graphics 630 / NVIDIA GeForce GTX 1060
    Sound Card
    Intel(R) Display Audio / Realtek(R) Audio
    Monitor(s) Displays
    Integrated Monitor (17.3"vis)
    Screen Resolution
    FHD 1920X1080 16:9
    Hard Drives
    2 SSD SATA/NVM Express 1.3
    WDS500G2B0A-00SM50 500.1 GB
    WDCSDAPNUW-1002 256 GB
    PSU
    19V DC 6.32 A 120 W
    Cooling
    Dual Fans
    Mouse
    MS Bluetooth
    Internet Speed
    Fiber 1GB Cox -us & ADSL Bouygues -fr
    Browser
    Edge Canary- Firefox Nightly
    Antivirus
    Windows Defender
    Other Info
    VMs of Windows 11 stable/Beta/Dev/Canary
    VM of XeroLinux- Arch based & Debian 12
  • Operating System
    Windows 11 Insider Canary
    Computer type
    Laptop
    Manufacturer/Model
    ASUS X751BP
    CPU
    AMD Dual Core A6-9220
    Motherboard
    ASUS
    Memory
    8 GB
    Graphics card(s)
    AMD Radeon R5 M420
    Sound Card
    Realtek
    Monitor(s) Displays
    17.3
    Screen Resolution
    1600X900 16:9
    Hard Drives
    1TB 5400RPM
@glasskuter,

Apologies for the slow response. I'm glad you were able to get it working in the meantime.

There are still some things about VMware workstation that I really like, especially at the price of free :-).
 

My Computers

System One System Two

  • OS
    Win11 Pro 23H2
    Computer type
    PC/Desktop
    Manufacturer/Model
    Home Built
    CPU
    Intel i7-11700K
    Motherboard
    ASUS Prime Z590-A
    Memory
    128GB Crucial Ballistix 3200MHz DRAM
    Graphics Card(s)
    No GPU - CPU graphics only (for now)
    Sound Card
    Realtek (on motherboard)
    Monitor(s) Displays
    HP Envy 32
    Screen Resolution
    2560 x 1440
    Hard Drives
    1 x 1TB NVMe Gen 4 x 4 SSD
    1 x 2TB NVMe Gen 3 x 4 SSD
    2 x 512GB 2.5" SSDs
    2 x 8TB HD
    PSU
    Corsair HX850i
    Case
    Corsair iCue 5000X RGB
    Cooling
    Noctua NH-D15 chromax.black cooler + 10 case fans
    Keyboard
    CODE backlit mechanical keyboard
    Mouse
    Logitech MX Master 3
    Internet Speed
    1Gb Up / 1 Gb Down
    Browser
    Edge
    Antivirus
    Windows Defender
    Other Info
    Additional options installed:
    WiFi 6E PCIe adapter
    ASUS ThunderboltEX 4 PCIe adapter
  • Operating System
    Win11 Pro 23H2
    Computer type
    Laptop
    Manufacturer/Model
    Lenovo ThinkBook 13x Gen 2
    CPU
    Intel i7-1255U
    Memory
    16 GB
    Graphics card(s)
    Intel Iris Xe Graphics
    Sound Card
    Realtek® ALC3306-CG codec
    Monitor(s) Displays
    13.3-inch IPS Display
    Screen Resolution
    WQXGA (2560 x 1600)
    Hard Drives
    2 TB 4 x 4 NVMe SSD
    PSU
    USB-C / Thunderbolt 4 Power / Charging
    Mouse
    Buttonless Glass Precision Touchpad
    Keyboard
    Backlit, spill resistant keyboard
    Internet Speed
    1Gb Up / 1Gb Down
    Browser
    Edge
    Antivirus
    Windows Defender
    Other Info
    WiFi 6e / Bluetooth 5.1 / Facial Recognition / Fingerprint Sensor / ToF (Time of Flight) Human Presence Sensor
For those who are new to VMware, one of the things that I really love about VMware is how easy it is to save the activation state.

I have a VM that I actually activated. To save the activation state, simply do this:

Open the directory that the activated VM is stored in.
Open the file that has the .VMX extension in notepad.
Find the line that starts with "uuid.bios". Copy and save this entire line in a text file or write it down carefully.

Now, if you ever reinstall Windows to the VM, do this:

Create your VM.
Open the .VMX file in notepad.
Replace the line that with "uuid.bios" with the line that you saved.
Install Windows. It should activate successfully.

NOTE: If you prefer, you can install Windows first, shutdown the VM, and then replace the uuid.bios line, restart Windows, and activate it.

Having an activated VM that you can easily recycle makes life a whole lot easier.
 

My Computers

System One System Two

  • OS
    Win11 Pro 23H2
    Computer type
    PC/Desktop
    Manufacturer/Model
    Home Built
    CPU
    Intel i7-11700K
    Motherboard
    ASUS Prime Z590-A
    Memory
    128GB Crucial Ballistix 3200MHz DRAM
    Graphics Card(s)
    No GPU - CPU graphics only (for now)
    Sound Card
    Realtek (on motherboard)
    Monitor(s) Displays
    HP Envy 32
    Screen Resolution
    2560 x 1440
    Hard Drives
    1 x 1TB NVMe Gen 4 x 4 SSD
    1 x 2TB NVMe Gen 3 x 4 SSD
    2 x 512GB 2.5" SSDs
    2 x 8TB HD
    PSU
    Corsair HX850i
    Case
    Corsair iCue 5000X RGB
    Cooling
    Noctua NH-D15 chromax.black cooler + 10 case fans
    Keyboard
    CODE backlit mechanical keyboard
    Mouse
    Logitech MX Master 3
    Internet Speed
    1Gb Up / 1 Gb Down
    Browser
    Edge
    Antivirus
    Windows Defender
    Other Info
    Additional options installed:
    WiFi 6E PCIe adapter
    ASUS ThunderboltEX 4 PCIe adapter
  • Operating System
    Win11 Pro 23H2
    Computer type
    Laptop
    Manufacturer/Model
    Lenovo ThinkBook 13x Gen 2
    CPU
    Intel i7-1255U
    Memory
    16 GB
    Graphics card(s)
    Intel Iris Xe Graphics
    Sound Card
    Realtek® ALC3306-CG codec
    Monitor(s) Displays
    13.3-inch IPS Display
    Screen Resolution
    WQXGA (2560 x 1600)
    Hard Drives
    2 TB 4 x 4 NVMe SSD
    PSU
    USB-C / Thunderbolt 4 Power / Charging
    Mouse
    Buttonless Glass Precision Touchpad
    Keyboard
    Backlit, spill resistant keyboard
    Internet Speed
    1Gb Up / 1Gb Down
    Browser
    Edge
    Antivirus
    Windows Defender
    Other Info
    WiFi 6e / Bluetooth 5.1 / Facial Recognition / Fingerprint Sensor / ToF (Time of Flight) Human Presence Sensor
It's an epic quest to download anything from Broadcom. They make it nearly impossible, so as to weed out the unworthy. What worked for me was following the download link in the blog post below, which required creating an account, and from there, it continued to be the most confusing website I've ever used, but I was successful in the end (don't ask me for more details, I've been actively trying to forget the trauma):


It's so bad, someone has since written a detailed article on it, documenting much of what I experienced. The inability to use my password manager to copy/paste passwords as part of the required account creation really ticked me off, but that was just the tip of the iceberg. I don't know what drugs those Broadcom people are on, but I know I don't want any.


My Computer

System One

  • OS
    Windows 11
I have migrated over completely to Hyper-V, but there is just one tiny thing that bothers me with Hyper-V: If you install Windows in VMware Workstation you can per perform personalization tasks up until you allow your VMware guest to have Internet access. With Hyper-V, you cannot perform personalization tasks (unless you activate Windows) even with networking turned off.

I don't usually care about personalization, but for those times where it matters, I prefer VMware Workstation as a last resort.
Surely, this can only be possible if your vmware vm is activated.
 

My Computer

System One

  • OS
    Windows 10 Pro + others in VHDs
    Computer type
    Laptop
    Manufacturer/Model
    ASUS Vivobook 14
    CPU
    I7
    Motherboard
    Yep, Laptop has one.
    Memory
    16 GB
    Graphics Card(s)
    Integrated Intel Iris XE
    Sound Card
    Realtek built in
    Monitor(s) Displays
    N/A
    Screen Resolution
    1920x1080
    Hard Drives
    1 TB Optane NVME SSD, 1 TB NVME SSD
    PSU
    Yep, got one
    Case
    Yep, got one
    Cooling
    Stella Artois
    Keyboard
    Built in
    Mouse
    Bluetooth , wired
    Internet Speed
    72 Mb/s :-(
    Browser
    Edge mostly
    Antivirus
    Defender
    Other Info
    TPM 2.0
For those who are new to VMware, one of the things that I really love about VMware is how easy it is to save the activation state.

I have a VM that I actually activated. To save the activation state, simply do this:

Open the directory that the activated VM is stored in.
Open the file that has the .VMX extension in notepad.
Find the line that starts with "uuid.bios". Copy and save this entire line in a text file or write it down carefully.

Now, if you ever reinstall Windows to the VM, do this:

Create your VM.
Open the .VMX file in notepad.
Replace the line that with "uuid.bios" with the line that you saved.
Install Windows. It should activate successfully.

NOTE: If you prefer, you can install Windows first, shutdown the VM, and then replace the uuid.bios line, restart Windows, and activate it.

Having an activated VM that you can easily recycle makes life a whole lot easier.

With Hyper-V, once you have activated a vm, you do not even need to save anything. You can change out vhd containing OS as often as you like so long as it is same edition e.g. Pro or Home. In fact if you activate vm with Pro, it will also activate Home as well.
 

My Computer

System One

  • OS
    Windows 10 Pro + others in VHDs
    Computer type
    Laptop
    Manufacturer/Model
    ASUS Vivobook 14
    CPU
    I7
    Motherboard
    Yep, Laptop has one.
    Memory
    16 GB
    Graphics Card(s)
    Integrated Intel Iris XE
    Sound Card
    Realtek built in
    Monitor(s) Displays
    N/A
    Screen Resolution
    1920x1080
    Hard Drives
    1 TB Optane NVME SSD, 1 TB NVME SSD
    PSU
    Yep, got one
    Case
    Yep, got one
    Cooling
    Stella Artois
    Keyboard
    Built in
    Mouse
    Bluetooth , wired
    Internet Speed
    72 Mb/s :-(
    Browser
    Edge mostly
    Antivirus
    Defender
    Other Info
    TPM 2.0
With Hyper-V, once you have activated a vm, you do not even need to save anything. You can change out vhd containing OS as often as you like so long as it is same edition e.g. Pro or Home. In fact if you activate vm with Pro, it will also activate Home as well.
You can swap out the VHD, but how do you get your VM back after a reinstallation or move to a new machine?

You can disconnect the VHD and then backup the VHD. At least in this way it's only about 4 MB. But with VMware, you literally only need to save a few bytes of data.
 

My Computers

System One System Two

  • OS
    Win11 Pro 23H2
    Computer type
    PC/Desktop
    Manufacturer/Model
    Home Built
    CPU
    Intel i7-11700K
    Motherboard
    ASUS Prime Z590-A
    Memory
    128GB Crucial Ballistix 3200MHz DRAM
    Graphics Card(s)
    No GPU - CPU graphics only (for now)
    Sound Card
    Realtek (on motherboard)
    Monitor(s) Displays
    HP Envy 32
    Screen Resolution
    2560 x 1440
    Hard Drives
    1 x 1TB NVMe Gen 4 x 4 SSD
    1 x 2TB NVMe Gen 3 x 4 SSD
    2 x 512GB 2.5" SSDs
    2 x 8TB HD
    PSU
    Corsair HX850i
    Case
    Corsair iCue 5000X RGB
    Cooling
    Noctua NH-D15 chromax.black cooler + 10 case fans
    Keyboard
    CODE backlit mechanical keyboard
    Mouse
    Logitech MX Master 3
    Internet Speed
    1Gb Up / 1 Gb Down
    Browser
    Edge
    Antivirus
    Windows Defender
    Other Info
    Additional options installed:
    WiFi 6E PCIe adapter
    ASUS ThunderboltEX 4 PCIe adapter
  • Operating System
    Win11 Pro 23H2
    Computer type
    Laptop
    Manufacturer/Model
    Lenovo ThinkBook 13x Gen 2
    CPU
    Intel i7-1255U
    Memory
    16 GB
    Graphics card(s)
    Intel Iris Xe Graphics
    Sound Card
    Realtek® ALC3306-CG codec
    Monitor(s) Displays
    13.3-inch IPS Display
    Screen Resolution
    WQXGA (2560 x 1600)
    Hard Drives
    2 TB 4 x 4 NVMe SSD
    PSU
    USB-C / Thunderbolt 4 Power / Charging
    Mouse
    Buttonless Glass Precision Touchpad
    Keyboard
    Backlit, spill resistant keyboard
    Internet Speed
    1Gb Up / 1Gb Down
    Browser
    Edge
    Antivirus
    Windows Defender
    Other Info
    WiFi 6e / Bluetooth 5.1 / Facial Recognition / Fingerprint Sensor / ToF (Time of Flight) Human Presence Sensor
You can swap out the VHD, but how do you get your VM back after a reinstallation or move to a new machine?

You can disconnect the VHD and then backup the VHD. At least in this way it's only about 4 MB. But with VMware, you literally only need to save a few bytes of data.
You can preserve the unique ID a Hyper-V VM by exporting it without a VHD then importing it to a new host and selecting the option to import using the existing ID.

But yes, a single line of text is much easier to save. :wink:

VirtualBox works the same way as VMware. There's a Machine uuid="{ a unique uuid number }" at the beginning of the VM's Vbox.xml.

1715852991769.png
 
Last edited:

My Computers

System One System Two

  • OS
    Windows 11 Home
    Computer type
    Laptop
    Manufacturer/Model
    Acer Aspire 3 A315-23
    CPU
    AMD Athlon Silver 3050U
    Memory
    8GB
    Graphics Card(s)
    Radeon Graphics
    Monitor(s) Displays
    laptop screen
    Screen Resolution
    1366x768 native resolution, up to 2560x1440 with Radeon Virtual Super Resolution
    Hard Drives
    1TB Samsung EVO 870 SSD
    Internet Speed
    50 Mbps
    Browser
    Edge, Firefox
    Antivirus
    Defender
    Other Info
    fully 'Windows 11 ready' laptop. Windows 10 C: partition migrated from my old unsupported 'main machine' then upgraded to 11. A test migration ran Insider builds for 2 months. When 11 was released on 5th October it was re-imaged back to 10 and was offered the upgrade in Windows Update on 20th October. Windows Update offered the 22H2 Feature Update on 20th September 2022. It got the 23H2 Feature Update on 4th November 2023 through Windows Update.

    My SYSTEM THREE is a Dell Latitude 5410, i7-10610U, 32GB RAM, 512GB NVMe ssd, supported device running Windows 11 Pro (and all my Hyper-V VMs).

    My SYSTEM FOUR is a 2-in-1 convertible Lenovo Yoga 11e 20DA, Celeron N2930, 8GB RAM, 256GB ssd. Unsupported device: currently running Win10 Pro, plus Win11 Pro RTM and Insider Beta as native boot vhdx.

    My SYSTEM FIVE is a Dell Latitude 3190 2-in-1, Pentium Silver N5030, 4GB RAM, 512GB NVMe ssd, supported device running Windows 11 Pro, plus the Insider Beta, Dev, Canary, and Release Preview builds as a native boot .vhdx.
  • Operating System
    Windows 11 Pro
    Computer type
    Laptop
    Manufacturer/Model
    Dell Lattitude E4310
    CPU
    Intel® Core™ i5-520M
    Motherboard
    0T6M8G
    Memory
    8GB
    Graphics card(s)
    (integrated graphics) Intel HD Graphics
    Screen Resolution
    1366x768
    Hard Drives
    500GB Crucial MX500 SSD
    Browser
    Firefox, Edge
    Antivirus
    Defender
    Other Info
    unsupported machine: Legacy bios, MBR, TPM 1.2, upgraded from W10 to W11 using W10/W11 hybrid install media workaround. In-place upgrade to 22H2 using ISO and a workaround. Feature Update to 23H2 by manually installing the Enablement Package. Also running Insider Beta, Dev, and Canary builds as a native boot .vhdx.

    My SYSTEM THREE is a Dell Latitude 5410, i7-10610U, 32GB RAM, 512GB NVMe ssd, supported device running Windows 11 Pro (and all my Hyper-V VMs).

    My SYSTEM FOUR is a 2-in-1 convertible Lenovo Yoga 11e 20DA, Celeron N2930, 8GB RAM, 256GB ssd. Unsupported device: currently running Win10 Pro, plus Win11 Pro RTM and Insider Beta as native boot vhdx.

    My SYSTEM FIVE is a Dell Latitude 3190 2-in-1, Pentium Silver N5030, 4GB RAM, 512GB NVMe ssd, supported device running Windows 11 Pro, plus the Insider Beta, Dev, Canary, and Release Preview builds as a native boot .vhdx.
You can preserve the unique ID a Hyper-V VM by exporting it without a VHD then importing it to a new host and selecting the option to import using the existing ID.

But yes, a single line of text is much easier to save. :wink:

VirtualBox works the same way as VMware. There's a Machine uuid="{ a unique uuid number }" at the beginning of the VM's Vbox.xml.

View attachment 96344
Indeed.
I've used this quite a few times too.

So it is in KVM/QEMU as well.
A VM provides XML settings with a uuid tag.

1715856743435.png

Since those are hidden or handled differently in Hyper-V, it is more confusing to apply something similar there if one doesn't know where to start.
Luckily we have those great tutorials by Kari, from there I was able to 'transfer' a uuid in Hyper-V.
EDIT: yes, by exporting vm without vhd.
 

My Computers

System One System Two

  • OS
    Windows 11 Pro
    Computer type
    PC/Desktop
    Manufacturer/Model
    Intel NUC
    CPU
    i3 8109U
    Motherboard
    Intel
    Memory
    16GB DDR4 @2400
    Graphics Card(s)
    Intel Iris Plus Graphics 655
    Sound Card
    Intel / Realtek HD Audio
    Monitor(s) Displays
    LG-32ML600M
    Screen Resolution
    1920x1080
    Hard Drives
    Intel SSD 250GB + Samsung QVO SSD 1TB
    PSU
    Adapter
    Cooling
    The usual NUC airflow
    Keyboard
    Logitech Orion G610
    Mouse
    SteelSeries Rival 100 Red
    Internet Speed
    Good enough
    Browser
    Chromium, Edge, Firefox
    Antivirus
    Windows Defender
  • Operating System
    CentOS 9 Stream / Alma / Rocky / Fedora
    Computer type
    Laptop
    Manufacturer/Model
    TOSHIBA
    CPU
    Intel i7 4800MQ
    Motherboard
    TOSHIBA
    Memory
    32GB DDR3 @1600
    Graphics card(s)
    NVIDIA Quadro K2100M
    Sound Card
    Realtek HD Audio
    Monitor(s) Displays
    Built-in
    Screen Resolution
    1920x1080
Should i stop using VMware and use Oracle VM VirtualBox?
I think you can keep using VMware.
Those site issues should settle once they move everything over.
Usually clear the cookies and the cache in your browser just to make sure and try again, on the new website.

But you can give other alternatives a try, that way you'll know directly from first hand experience rather than just recommendations of others.
 

My Computers

System One System Two

  • OS
    Windows 11 Pro
    Computer type
    PC/Desktop
    Manufacturer/Model
    Intel NUC
    CPU
    i3 8109U
    Motherboard
    Intel
    Memory
    16GB DDR4 @2400
    Graphics Card(s)
    Intel Iris Plus Graphics 655
    Sound Card
    Intel / Realtek HD Audio
    Monitor(s) Displays
    LG-32ML600M
    Screen Resolution
    1920x1080
    Hard Drives
    Intel SSD 250GB + Samsung QVO SSD 1TB
    PSU
    Adapter
    Cooling
    The usual NUC airflow
    Keyboard
    Logitech Orion G610
    Mouse
    SteelSeries Rival 100 Red
    Internet Speed
    Good enough
    Browser
    Chromium, Edge, Firefox
    Antivirus
    Windows Defender
  • Operating System
    CentOS 9 Stream / Alma / Rocky / Fedora
    Computer type
    Laptop
    Manufacturer/Model
    TOSHIBA
    CPU
    Intel i7 4800MQ
    Motherboard
    TOSHIBA
    Memory
    32GB DDR3 @1600
    Graphics card(s)
    NVIDIA Quadro K2100M
    Sound Card
    Realtek HD Audio
    Monitor(s) Displays
    Built-in
    Screen Resolution
    1920x1080
You can swap out the VHD, but how do you get your VM back after a reinstallation or move to a new machine?

You can disconnect the VHD and then backup the VHD. At least in this way it's only about 4 MB. But with VMware, you literally only need to save a few bytes of data.
Save the vm config files - they are tiny.
 

My Computer

System One

  • OS
    Windows 10 Pro + others in VHDs
    Computer type
    Laptop
    Manufacturer/Model
    ASUS Vivobook 14
    CPU
    I7
    Motherboard
    Yep, Laptop has one.
    Memory
    16 GB
    Graphics Card(s)
    Integrated Intel Iris XE
    Sound Card
    Realtek built in
    Monitor(s) Displays
    N/A
    Screen Resolution
    1920x1080
    Hard Drives
    1 TB Optane NVME SSD, 1 TB NVME SSD
    PSU
    Yep, got one
    Case
    Yep, got one
    Cooling
    Stella Artois
    Keyboard
    Built in
    Mouse
    Bluetooth , wired
    Internet Speed
    72 Mb/s :-(
    Browser
    Edge mostly
    Antivirus
    Defender
    Other Info
    TPM 2.0

My Computers

System One System Two

  • OS
    Windows 11 Pro
    Computer type
    PC/Desktop
    Manufacturer/Model
    Beelink SEI8
    CPU
    Intel Core i5-8279u
    Motherboard
    AZW SEI
    Memory
    32GB DDR4 2666Mhz
    Graphics Card(s)
    Intel Iris Plus 655
    Sound Card
    Intel SST
    Monitor(s) Displays
    Asus ProArt PA278QV
    Screen Resolution
    2560x1440
    Hard Drives
    512GB NVMe
    PSU
    NA
    Case
    NA
    Cooling
    NA
    Keyboard
    NA
    Mouse
    NA
    Internet Speed
    500/50
    Browser
    Edge
    Antivirus
    Defender
    Other Info
    Mini PC used for testing Windows 11.
  • Operating System
    Windows 10 Pro
    Computer type
    PC/Desktop
    Manufacturer/Model
    Custom
    CPU
    Ryzen 9 5900x
    Motherboard
    Asus Rog Strix X570-E Gaming
    Memory
    64GB DDR4-3600
    Graphics card(s)
    EVGA GeForce 3080 FT3 Ultra
    Sound Card
    Onboard
    Monitor(s) Displays
    ASUS TUF Gaming VG27AQ. ASUS ProArt Display PA278QV 27” WQHD
    Screen Resolution
    2560x1440
    Hard Drives
    2TB WD SN850 PCI-E Gen 4 NVMe
    2TB Sandisk Ultra 2.5" SATA SSD
    PSU
    Seasonic Focus 850
    Case
    Fractal Meshify S2 in White
    Cooling
    Dark Rock Pro CPU cooler, 3 x 140mm case fans
    Mouse
    Logitech G9 Laser Mouse
    Keyboard
    Corsiar K65 RGB Lux
    Internet Speed
    500/50
    Browser
    Chrome
    Antivirus
    Defender.
Saw this story and laughed.

I fail to see the humor.
I must have been lucky as Workstation Pro downloaded on the first try.
Actually the two lonely comments located at the bottom of the so called article
reported downloading the software successfully.
 

My Computers

System One System Two

  • OS
    Win11 All /Debian/Arch
    Computer type
    Laptop
    Manufacturer/Model
    ASUSTeK COMPUTER INC. TUF Gaming FX705GM
    CPU
    2.20 gigahertz Intel i7-8750H Hyper-threaded 12 cores
    Motherboard
    ASUSTeK COMPUTER INC. FX705GM 1.0
    Memory
    24428 Megabytes
    Graphics Card(s)
    Intel(R) UHD Graphics 630 / NVIDIA GeForce GTX 1060
    Sound Card
    Intel(R) Display Audio / Realtek(R) Audio
    Monitor(s) Displays
    Integrated Monitor (17.3"vis)
    Screen Resolution
    FHD 1920X1080 16:9
    Hard Drives
    2 SSD SATA/NVM Express 1.3
    WDS500G2B0A-00SM50 500.1 GB
    WDCSDAPNUW-1002 256 GB
    PSU
    19V DC 6.32 A 120 W
    Cooling
    Dual Fans
    Mouse
    MS Bluetooth
    Internet Speed
    Fiber 1GB Cox -us & ADSL Bouygues -fr
    Browser
    Edge Canary- Firefox Nightly
    Antivirus
    Windows Defender
    Other Info
    VMs of Windows 11 stable/Beta/Dev/Canary
    VM of XeroLinux- Arch based & Debian 12
  • Operating System
    Windows 11 Insider Canary
    Computer type
    Laptop
    Manufacturer/Model
    ASUS X751BP
    CPU
    AMD Dual Core A6-9220
    Motherboard
    ASUS
    Memory
    8 GB
    Graphics card(s)
    AMD Radeon R5 M420
    Sound Card
    Realtek
    Monitor(s) Displays
    17.3
    Screen Resolution
    1600X900 16:9
    Hard Drives
    1TB 5400RPM

Attachments

  • Capture d’écran 2024-05-16 100643.png
    Capture d’écran 2024-05-16 100643.png
    17.7 KB · Views: 4

My Computer

System One

  • OS
    Windows 11 Pro Micro 24H2 OS Build 26100.1
    Computer type
    Laptop
    Manufacturer/Model
    Lenovo Ideapad 330 15ARR
    CPU
    AMD Ryzen 5 2500u
    Memory
    Crucial 12Go
    Graphics Card(s)
    Integrated Radeon Vega 8 Graphics
    Monitor(s) Displays
    SAMSUNG Curv - C24F390
    Screen Resolution
    1920*1080
    Hard Drives
    SSD 500go Crucial Mx500
    HDD 1To WD
    Browser
    Thorium 124.0.6367.218 (Build officiel) & Arc browser
    Antivirus
    Windows Defender
  • Like
Reactions: OAT

My Computers

System One System Two

  • OS
    Windows11 Pro ***26100.712
    Computer type
    PC/Desktop
    Manufacturer/Model
    Digital Storm Velox
    CPU
    Intel Core i9-10940X
    Motherboard
    MSI X299 PRO (Intel X299 Chipset) (Up to 4x PCI-E Devices)
    Memory
    128 GB DDR4 3200 MHz Corsair Vengance LPX
    Graphics Card(s)
    EVGA GeForce RTX 2080 Ti Black
    Sound Card
    Integrated Motherboard Audio-Realtek
    Monitor(s) Displays
    CORSAIR XENEON 32QHD165
    Screen Resolution
    2560 x 1440
    Hard Drives
    2 Samsung 980 Pro NVME 2TB
    1x Storage (6TB Western Digital
    PSU
    Corsair / EVGA / Thermaltake (Modular) (80 Plus Gold)
    Case
    VELOX
    Cooling
    H20: Stage 2: Digital Storm Vortex Liquid CPU Cooler (Dual Fan) (Fully Sealed + No Maintenance)
    Keyboard
    Corsair K63 Wireless
    Mouse
    Corsair NIGHTSWORD RGB
    Internet Speed
    1000Gb's Down-20 Up
    Browser
    Firefox 126.0
    Antivirus
    Windows Defender
    Other Info
    Cyber power CP1350AVRLCD -UPS
    NVIDIA 560.38 Driver
  • Operating System
    Arch Linux
    Computer type
    PC/Desktop
    Manufacturer/Model
    Intel NUC13ANHi3
    CPU
    Intel Core i3 1315u
    Motherboard
    NUC13AN
    Memory
    64GB GSKILL DDR4 3200
    Graphics card(s)
    Intel On Board
    Sound Card
    Intel on Board
    Monitor(s) Displays
    Dell 2419HGCF
    Screen Resolution
    1920 X 1080
    Hard Drives
    1TB Crucial M2NVME
    PSU
    External 90 Watt
    Case
    NUC Tall
    Cooling
    Fan
    Mouse
    Razer
    Keyboard
    Logitech
    Internet Speed
    1GB
    Browser
    Slimjet 43.0.1.0
    Other Info
    quiet & fast

Zero issues with the downloads.
I too had no difficulty obtaining the free version. I did notice one difference in behavior from when I used to use VMware in the past before I transitioned to Hyper-V but can't swear that what I am seeing is not a change in Windows itself.
 

My Computers

System One System Two

  • OS
    Win11 Pro 23H2
    Computer type
    PC/Desktop
    Manufacturer/Model
    Home Built
    CPU
    Intel i7-11700K
    Motherboard
    ASUS Prime Z590-A
    Memory
    128GB Crucial Ballistix 3200MHz DRAM
    Graphics Card(s)
    No GPU - CPU graphics only (for now)
    Sound Card
    Realtek (on motherboard)
    Monitor(s) Displays
    HP Envy 32
    Screen Resolution
    2560 x 1440
    Hard Drives
    1 x 1TB NVMe Gen 4 x 4 SSD
    1 x 2TB NVMe Gen 3 x 4 SSD
    2 x 512GB 2.5" SSDs
    2 x 8TB HD
    PSU
    Corsair HX850i
    Case
    Corsair iCue 5000X RGB
    Cooling
    Noctua NH-D15 chromax.black cooler + 10 case fans
    Keyboard
    CODE backlit mechanical keyboard
    Mouse
    Logitech MX Master 3
    Internet Speed
    1Gb Up / 1 Gb Down
    Browser
    Edge
    Antivirus
    Windows Defender
    Other Info
    Additional options installed:
    WiFi 6E PCIe adapter
    ASUS ThunderboltEX 4 PCIe adapter
  • Operating System
    Win11 Pro 23H2
    Computer type
    Laptop
    Manufacturer/Model
    Lenovo ThinkBook 13x Gen 2
    CPU
    Intel i7-1255U
    Memory
    16 GB
    Graphics card(s)
    Intel Iris Xe Graphics
    Sound Card
    Realtek® ALC3306-CG codec
    Monitor(s) Displays
    13.3-inch IPS Display
    Screen Resolution
    WQXGA (2560 x 1600)
    Hard Drives
    2 TB 4 x 4 NVMe SSD
    PSU
    USB-C / Thunderbolt 4 Power / Charging
    Mouse
    Buttonless Glass Precision Touchpad
    Keyboard
    Backlit, spill resistant keyboard
    Internet Speed
    1Gb Up / 1Gb Down
    Browser
    Edge
    Antivirus
    Windows Defender
    Other Info
    WiFi 6e / Bluetooth 5.1 / Facial Recognition / Fingerprint Sensor / ToF (Time of Flight) Human Presence Sensor
I still have VMware Workstation 17 Player installed when i install latest VMware Workstation.
 

My Computer

System One

  • OS
    Windows 11
I still have VMware Workstation 17 Player installed when i install latest VMware Workstation.
Did you actually READ the comment in a couple of previous posts.

VMWare player is STILL installed when you install VMWare workstation. What the article is saying is that the application is discontinued as a separately installable product.

Cheers
jimbo
 

My Computer

System One

  • OS
    Windows XP,7,10,11 Linux Arch Linux
    Computer type
    PC/Desktop
    CPU
    2 X Intel i7
I'm not certain about Workstation Player, but with Fusion Player (the macOS version) update, it's necessary to remove the 'old' Free to use Licence, after which the updated version then automatically shows as "VMware Fusion Professional Version Licensed for Personal Use only". That can be done via the command line, or by completely uninstalling the old installation which also removes the old 'free to use' license details; and then reinstall using the latest update.
 

My Computers

System One System Two

  • OS
    macOS (plus VMs: Windows XP, 7, 10 Home/Pro, 11 Home/Pro, Linux Distros)
    Computer type
    Laptop
    Manufacturer/Model
    a) Apple MacBook Pro (Intel) - 2019 b) Apple MacBook Pro M1 MAX - 2021
    CPU
    a) Intel i9 b) M1 MAX (ARM)
    Memory
    a) 16GB b) 32GB
    Hard Drives
    a) 1TB SSD + 256GB SD Card b) 1TB SSD (+ 1TB SD Card)
    Browser
    a) Safari/Vivaldi/DuckDuckGo b) Safari/DuckDuckGo
    Antivirus
    -
  • Operating System
    Windows 11 Pro (plus VirtualBox VMs: Windows 11 Pro & Linux Distros)
    Computer type
    Laptop
    Manufacturer/Model
    a) Microsoft Surface Book 2, b) HP Spectre X360
    CPU
    a) i7, b) i7
    Memory
    a) 16GB, b) 16GB
    Hard Drives
    a) 1TB SSD, b) 1TB SSD
    Browser
    a) MS Edge, b) MS Edge
    Antivirus
    a) Defender, b) Defender
I'm not certain about Workstation Player, but with Fusion Player (the macOS version) update, it's necessary to remove the 'old' Free to use Licence, after which the updated version then automatically shows as "VMware Fusion Professional Version Licensed for Personal Use only". That can be done via the command line, or by completely uninstalling the old installation which also removes the old 'free to use' license; and then reinstalling using the latest update.
Uninstalling is not needed in Windows as both can run side by side.
The Workstation really only adds a GUI to manage the VMs along with some configuration tweaks.


Screenshot 2024-05-23 192942.jpeg
 

My Computers

System One System Two

  • OS
    Win11 All /Debian/Arch
    Computer type
    Laptop
    Manufacturer/Model
    ASUSTeK COMPUTER INC. TUF Gaming FX705GM
    CPU
    2.20 gigahertz Intel i7-8750H Hyper-threaded 12 cores
    Motherboard
    ASUSTeK COMPUTER INC. FX705GM 1.0
    Memory
    24428 Megabytes
    Graphics Card(s)
    Intel(R) UHD Graphics 630 / NVIDIA GeForce GTX 1060
    Sound Card
    Intel(R) Display Audio / Realtek(R) Audio
    Monitor(s) Displays
    Integrated Monitor (17.3"vis)
    Screen Resolution
    FHD 1920X1080 16:9
    Hard Drives
    2 SSD SATA/NVM Express 1.3
    WDS500G2B0A-00SM50 500.1 GB
    WDCSDAPNUW-1002 256 GB
    PSU
    19V DC 6.32 A 120 W
    Cooling
    Dual Fans
    Mouse
    MS Bluetooth
    Internet Speed
    Fiber 1GB Cox -us & ADSL Bouygues -fr
    Browser
    Edge Canary- Firefox Nightly
    Antivirus
    Windows Defender
    Other Info
    VMs of Windows 11 stable/Beta/Dev/Canary
    VM of XeroLinux- Arch based & Debian 12
  • Operating System
    Windows 11 Insider Canary
    Computer type
    Laptop
    Manufacturer/Model
    ASUS X751BP
    CPU
    AMD Dual Core A6-9220
    Motherboard
    ASUS
    Memory
    8 GB
    Graphics card(s)
    AMD Radeon R5 M420
    Sound Card
    Realtek
    Monitor(s) Displays
    17.3
    Screen Resolution
    1600X900 16:9
    Hard Drives
    1TB 5400RPM
Back
Top Bottom