Solved 24H2 - Unable to install any UUP/DISM ISOs


I will assume you're technical enough to try this:

1. 24H2 WinPE Setup isn't really the same client as before, but you can try forcing WinPE to use the legacy Setup.
2. Make a backup copy of your ISO's boot.wim.

3. Mount boot.wim, and modify the SYSTEM registry.
Code:
DISM /Mount-Wim /WimFile:E:\sources\boot.wim /Index:2 /MountDir:C:\Mount

reg load HKLM\TEMP C:\Mount\Windows\System32\config\SYSTEM
reg add HKLM\TEMP\Setup /v CmdLine /t REG_SZ /d "cmd /c start /min wpeinit && \sources\setup" /f
reg unload HKLM\TEMP

DISM /Unmount-Wim /MountDir:C:\Mount /Commit

4. Now boot from the ISO, it should be running the old Setup. If that doesn't work, revert to the backup copy of boot.wim.
Hi, I`ve try this solution, but installation begin with Select the operation system you want to install window, with empty choose field form:
I`ve try to make it work with:
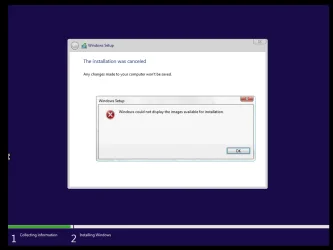
- Win11 24H2 original ISO + autounattend.xml + changed install.wim and boot.wim files
And installation begins with this windows, if i press next, this error appear: Screenshot
For the records tests are made on virtual machine.
Any ideas, how to skip this window?
Thank you.
 

Attachments

  • windows11_error.webp
    windows11_error.webp
    14.7 KB · Views: 1
  • windows11_error_1.webp
    windows11_error_1.webp
    16.6 KB · Views: 1

My Computer

System One

  • OS
    Windows 10
    Computer type
    Laptop
    Manufacturer/Model
    HP
    CPU
    AMD Ryzen 7 5800H
    Motherboard
    HP Victus by HP Laptop 16-e0xxx
    Memory
    64GB DDR4-3200
    Graphics Card(s)
    nVIDIA GeForce RTX 3060 Laptop
    Sound Card
    Realtek ALC245
@clouditsupport,

I think I know with 90% certainty what the problem is.

On your first screenshot, do you notice how there is no description shown for the selection that you are pointing you? That is the cause of setup stopping here. Both the NAME and DESCRIPTION metadata must by available but it is clearly missing from your image.

For clarification, here is an image showing what I mean:

Picture1.webp

I wrote a program to allow me to modify this but I know that in my notes I have the manual steps for doing this. Bear with me - I will post back again when I find my notes.
 

My Computers

System One System Two

  • OS
    Win11 Pro 24H2
    Computer type
    PC/Desktop
    Manufacturer/Model
    Self-built
    CPU
    Intel i7 11700K
    Motherboard
    ASUS Prime Z590-A MB
    Memory
    64GB (Waiting for warranty replacement of another 64GB for 128GB total)
    Graphics Card(s)
    No GPU - Built-in Intel Graphics
    Sound Card
    Integrated
    Monitor(s) Displays
    HP Envy 32
    Screen Resolution
    2560 x 1440
    Hard Drives
    1 x 1TB NVMe SSD
    1 x 2TB NVMe SSD
    1 x 4TB NVMe SSD
    3 x 512GB 2.5" SSD
    1 x 4TB 2.5" SSD
    5 x 8TB Seagate Barracuda HDD
    PSU
    Corsair HX850i
    Case
    Corsair iCUE RGB 5000X mid tower case
    Cooling
    Noctua NF-S12A chromax.black.swap case fans (Qty. 7) & Home Computer Specifications, Configuration, and Usage Notes General Specifications ASUS Prime Z590-A motherboard, serial number M1M0KC222467ARP Intel Core i7-11700K CPU (11th Gen Rocket Lake / LGA 1200 Socket) 128GB Crucial Ballistix RGB DDR4 3200 MHz DRAM (4 x 32GB) Corsair iCUE RGB 5000X mid tower case Noctua NH-D15 chromax.black CPU cooler Noctua NF-S12A chromax.black.swap case fans (Qty. 7) & Corsair LL-120 RGB Fans (Qty. 3)
    Keyboard
    Corsair K70 Max RGB Magnetic Keyboard
    Mouse
    Logitech MX Master 3
    Internet Speed
    1Gb Up / 1 Gb Down
    Browser
    Edge
    Antivirus
    Windows Defender
    Other Info
    The five 8TB drives and three 512GB SSDs are part of a DrivePool using StableBit DrivePool software. The three SSDs are devoted purely to caching for the 8TB drives. All of the important data is stored in triplicate so that I can withstand simultaneous failure of 2 disks.

    Networking: 2.5Gbps Ethernet and WiFi 6e
  • Operating System
    Win11 Pro 23H2
    Computer type
    Laptop
    Manufacturer/Model
    Lenovo ThinkBook 13x Gen 2
    CPU
    Intel i7-1255U
    Memory
    16 GB
    Graphics card(s)
    Intel Iris Xe Graphics
    Sound Card
    Realtek® ALC3306-CG codec
    Monitor(s) Displays
    13.3-inch IPS Display
    Screen Resolution
    WQXGA (2560 x 1600)
    Hard Drives
    2 TB 4 x 4 NVMe SSD
    PSU
    USB-C / Thunderbolt 4 Power / Charging
    Mouse
    Buttonless Glass Precision Touchpad
    Keyboard
    Backlit, spill resistant keyboard
    Internet Speed
    1Gb Up / 1Gb Down
    Browser
    Edge
    Antivirus
    Windows Defender
    Other Info
    WiFi 6e / Bluetooth 5.1 / Facial Recognition / Fingerprint Sensor / ToF (Time of Flight) Human Presence Sensor
One way to ensure that you have both a NAME and DESCRIPTION is to make sure to use BOTH the /name: and /description: options when capturing your image after the system has been syspreped like this:

DISM /capture-image /imagefile:C:\Image\install.wim /capturedir:C:\ /name:"W11 Pro" /description:"Win 11 Pro 21H2 x64" /ScratchDir:C:\Scratch /compress:maximum /checkintegrity /verify /bootable

However, if you need to alter the name and/or description after the image has already been captured you can do it like this:

Extract the install.wim from your ISO image and make sure that it is not marked as read-only.

For each index in the install.wim, run this command from and elevated Deployment and Imaging Tools Environment (to ensure you have access to the ImageX command):

ImageX /info <path to install.wim> <index_number> "Name" "Description" /check

Example:

ImageX /info d:\install.wim 1 "Win 11 Pro 24H2 Sysprep Image" "Image for Lenovo Laptop" /check

Note that the name and description can be the same, they do not need to be different.

If you are working with a sysprep image then you likely have just one index in your install.wim. However, if you are working with an install.wim that has more than one index, make sure to run the above command for each index number.

When done, you will need to recreate your ISO image or physical media replacing the existing install.wim with the one you just updated.

If you have any questions about this do let me know.
 

My Computers

System One System Two

  • OS
    Win11 Pro 24H2
    Computer type
    PC/Desktop
    Manufacturer/Model
    Self-built
    CPU
    Intel i7 11700K
    Motherboard
    ASUS Prime Z590-A MB
    Memory
    64GB (Waiting for warranty replacement of another 64GB for 128GB total)
    Graphics Card(s)
    No GPU - Built-in Intel Graphics
    Sound Card
    Integrated
    Monitor(s) Displays
    HP Envy 32
    Screen Resolution
    2560 x 1440
    Hard Drives
    1 x 1TB NVMe SSD
    1 x 2TB NVMe SSD
    1 x 4TB NVMe SSD
    3 x 512GB 2.5" SSD
    1 x 4TB 2.5" SSD
    5 x 8TB Seagate Barracuda HDD
    PSU
    Corsair HX850i
    Case
    Corsair iCUE RGB 5000X mid tower case
    Cooling
    Noctua NF-S12A chromax.black.swap case fans (Qty. 7) & Home Computer Specifications, Configuration, and Usage Notes General Specifications ASUS Prime Z590-A motherboard, serial number M1M0KC222467ARP Intel Core i7-11700K CPU (11th Gen Rocket Lake / LGA 1200 Socket) 128GB Crucial Ballistix RGB DDR4 3200 MHz DRAM (4 x 32GB) Corsair iCUE RGB 5000X mid tower case Noctua NH-D15 chromax.black CPU cooler Noctua NF-S12A chromax.black.swap case fans (Qty. 7) & Corsair LL-120 RGB Fans (Qty. 3)
    Keyboard
    Corsair K70 Max RGB Magnetic Keyboard
    Mouse
    Logitech MX Master 3
    Internet Speed
    1Gb Up / 1 Gb Down
    Browser
    Edge
    Antivirus
    Windows Defender
    Other Info
    The five 8TB drives and three 512GB SSDs are part of a DrivePool using StableBit DrivePool software. The three SSDs are devoted purely to caching for the 8TB drives. All of the important data is stored in triplicate so that I can withstand simultaneous failure of 2 disks.

    Networking: 2.5Gbps Ethernet and WiFi 6e
  • Operating System
    Win11 Pro 23H2
    Computer type
    Laptop
    Manufacturer/Model
    Lenovo ThinkBook 13x Gen 2
    CPU
    Intel i7-1255U
    Memory
    16 GB
    Graphics card(s)
    Intel Iris Xe Graphics
    Sound Card
    Realtek® ALC3306-CG codec
    Monitor(s) Displays
    13.3-inch IPS Display
    Screen Resolution
    WQXGA (2560 x 1600)
    Hard Drives
    2 TB 4 x 4 NVMe SSD
    PSU
    USB-C / Thunderbolt 4 Power / Charging
    Mouse
    Buttonless Glass Precision Touchpad
    Keyboard
    Backlit, spill resistant keyboard
    Internet Speed
    1Gb Up / 1Gb Down
    Browser
    Edge
    Antivirus
    Windows Defender
    Other Info
    WiFi 6e / Bluetooth 5.1 / Facial Recognition / Fingerprint Sensor / ToF (Time of Flight) Human Presence Sensor
@hsehestedt
Thank you for your help!
Currently I`m trying to use autounattend.xml file from this site:
And find which parameter from xml file is responsible for this window to appear:
More information about win24H2 and custom install.wim file i found here:
Will update, when find a solution.
 

My Computer

System One

  • OS
    Windows 10
    Computer type
    Laptop
    Manufacturer/Model
    HP
    CPU
    AMD Ryzen 7 5800H
    Motherboard
    HP Victus by HP Laptop 16-e0xxx
    Memory
    64GB DDR4-3200
    Graphics Card(s)
    nVIDIA GeForce RTX 3060 Laptop
    Sound Card
    Realtek ALC245
Tried it on a recent build of 24H2 and during the installing files screen at roughly 10% or so, I get a Windows installation failed confirmation prompt.
Okay, I had exactly the same problem but got it resolved. Now, my entire library of unattended answer files are working just fine.

My recollection is that there were two issues I had to resolve:

1) If you creating your ISO images, more specifically, if you are adding Windows updates to the images, you will get a failure during installation very early on (somewhere around 10%) if you have not updated EVERYTHING. In other words, just adding the latest cumulative update is not enough. You need to add the Latest Cumulative Update, Safe OS Dynamic Update, Setup Dynamic Update, and the SSU extracted from the LCU. The boot.wim, winre.wim, and install.wim should all be updated.

If #1 is not the issue and a manual install works, but unattended setup does not work, then look at this issue:

2) If I'm not mistaken, for this specific issue there was only one thing that I had to do. I had to omit the entire InstallFrom block from my answer file. In my testing I found that I should include an InstallFrom block ONLY if I am specifying a specific NAME metadata or index # to install. If you are doing this, simply leave off the InstallFrom block.

Example:

XML:
<?xml version="1.0" encoding="utf-8"?>
<!--
Last updated Mar 21, 2025

Notes about this answer file:

This answer file is for UEFI based systems only.

It includes a Windows 10 / 11 Pro key.

It creates an Admin level user named "WinUser", full name "Windows User" with an initial password of "Password1".

Locale settings are set to United States English.

Time zone is set to US Central Time. Change this if needed.

It includes settings to bypass Windows 11 system requirements.

The size of the Recovery Tools partition created by this answer will be larger than normal at 2 GB. Change this if you are very
short on space or prefer a smaller Recovery Tools partition.

It will install automatically to disk 0 and creates the recovery partition last, as Microsoft recommends. To accomplish this,
we do not use the standard method of specifying the disk configuration information, but we create a diskpart script to
configure the disk.

This answer file can be used with both Windows 10 and 11. The settings to bypass
Windows 11 system requirement checks will have no effect on Windows 10.

END OF NOTES
-->
<unattend xmlns="urn:schemas-microsoft-com:unattend">
    <settings pass="windowsPE">
        <component name="Microsoft-Windows-International-Core-WinPE" processorArchitecture="amd64" publicKeyToken="31bf3856ad364e35" language="neutral" versionScope="nonSxS" xmlns:wcm="http://schemas.microsoft.com/WMIConfig/2002/State" xmlns:xsi="http://www.w3.org/2001/XMLSchema-instance">
            <SetupUILanguage>
                <UILanguage>en-US</UILanguage>
            </SetupUILanguage>
            <InputLocale>en-US</InputLocale>
            <SystemLocale>en-US</SystemLocale>
            <UILanguage>en-US</UILanguage>
            <UserLocale>en-US</UserLocale>
        </component>
        <component name="Microsoft-Windows-Setup" processorArchitecture="amd64" publicKeyToken="31bf3856ad364e35" language="neutral" versionScope="nonSxS" xmlns:wcm="http://schemas.microsoft.com/WMIConfig/2002/State" xmlns:xsi="http://www.w3.org/2001/XMLSchema-instance">
            <ImageInstall>
                <OSImage>
                    <InstallTo>
                        <DiskID>0</DiskID>
                        <PartitionID>3</PartitionID>
                    </InstallTo>
                    <Compact>false</Compact>
                </OSImage>
            </ImageInstall>
            <UserData>
                <ProductKey>
                    <Key>VK7JG-NPHTM-C97JM-9MPGT-3V66T</Key>
                </ProductKey>
                <AcceptEula>true</AcceptEula>
            </UserData>
            <!--
The first 3 Synchronous Commands below bypass the Windows 11 system requirement checks. The checks that are bypassed are:

TPM Check
Secure Boot Check
RAM Check

The remaining Synchronous Commands will partition the hard disk with the following settings:

NOTE: Synchronous Command #4 selects disk 0. If disk 0 is not the disk you need to use, change this to the correct disk number.

Partion Type   |     Size (in MB)       | Format
================================================
    EFI        |            260         | FAT32
    MSR        |            128         | NONE
  Windows      | Remaining Space - 2 GB | NTFS
  Recovery     |           2,048        | NTFS
================================================
-->
            <RunSynchronous>
                <RunSynchronousCommand wcm:action="add">
                    <Order>1</Order>
                    <Path>reg add HKLM\System\Setup\LabConfig /v BypassTPMCheck /t reg_dword /d 0x00000001 /f</Path>
                </RunSynchronousCommand>
                <RunSynchronousCommand wcm:action="add">
                    <Order>2</Order>
                    <Path>reg add HKLM\System\Setup\LabConfig /v BypassSecureBootCheck /t reg_dword /d 0x00000001 /f</Path>
                </RunSynchronousCommand>
                <RunSynchronousCommand wcm:action="add">
                    <Order>3</Order>
                    <Path>reg add HKLM\System\Setup\LabConfig /v BypassRAMCheck /t reg_dword /d 0x00000001 /f</Path>
                </RunSynchronousCommand>
                <RunSynchronousCommand wcm:action="add">
                    <Order>4</Order>
                    <Path>cmd.exe /c echo select disk 0 &gt;&gt; X:\diskpartUEFI.txt</Path>
                </RunSynchronousCommand>
                <RunSynchronousCommand wcm:action="add">
                    <Order>5</Order>
                    <Path>cmd.exe /c echo clean &gt;&gt; X:\diskpartUEFI.txt</Path>
                </RunSynchronousCommand>
                <RunSynchronousCommand wcm:action="add">
                    <Order>6</Order>
                    <Path>cmd.exe /c echo convert gpt &gt;&gt; X:\diskpartUEFI.txt</Path>
                </RunSynchronousCommand>
                <RunSynchronousCommand wcm:action="add">
                    <Order>7</Order>
                    <Path>cmd.exe /c echo create partition efi size=260 &gt;&gt; X:\diskpartUEFI.txt</Path>
                </RunSynchronousCommand>
                <RunSynchronousCommand wcm:action="add">
                    <Order>8</Order>
                    <Path>cmd.exe /c echo format fs=fat32 quick label=&quot;System&quot; &gt;&gt; X:\diskpartUEFI.txt</Path>
                </RunSynchronousCommand>
                <RunSynchronousCommand wcm:action="add">
                    <Order>9</Order>
                    <Path>cmd.exe /c echo create partition msr size=128 &gt;&gt; X:\diskpartUEFI.txt</Path>
                </RunSynchronousCommand>
                <RunSynchronousCommand wcm:action="add">
                    <Order>10</Order>
                    <Path>cmd.exe /c echo create partition primary &gt;&gt; X:\diskpartUEFI.txt</Path>
                </RunSynchronousCommand>
                <RunSynchronousCommand wcm:action="add">
                    <Order>11</Order>
                    <Path>cmd.exe /c echo shrink desired=2048 minimum=2048  &gt;&gt; X:\diskpartUEFI.txt</Path>
                </RunSynchronousCommand>
                <RunSynchronousCommand wcm:action="add">
                    <Order>12</Order>
                    <Path>cmd.exe /c echo format fs=ntfs quick label=&quot;Windows&quot; &gt;&gt; X:\diskpartUEFI.txt</Path>
                </RunSynchronousCommand>
                <RunSynchronousCommand wcm:action="add">
                    <Order>13</Order>
                    <Path>cmd.exe /c echo assign letter=W &gt;&gt; X:\diskpartUEFI.txt</Path>
                </RunSynchronousCommand>
                <RunSynchronousCommand wcm:action="add">
                    <Order>14</Order>
                    <Path>cmd.exe /c echo create partition primary &gt;&gt; X:\diskpartUEFI.txt</Path>
                </RunSynchronousCommand>
                <RunSynchronousCommand wcm:action="add">
                    <Order>15</Order>
                    <Path>cmd.exe /c echo format fs=ntfs quick label=&quot;Recovery&quot; &gt;&gt; X:\diskpartUEFI.txt</Path>
                </RunSynchronousCommand>
                <RunSynchronousCommand wcm:action="add">
                    <Order>16</Order>
                    <Path>cmd.exe /c echo set id=&quot;de94bba4-06d1-4d40-a16a-bfd50179d6ac&quot; &gt;&gt; X:\diskpartUEFI.txt</Path>
                </RunSynchronousCommand>
                <RunSynchronousCommand wcm:action="add">
                    <Order>17</Order>
                    <Path>cmd.exe /c echo gpt attributes=0x8000000000000001 &gt;&gt; X:\diskpartUEFI.txt</Path>
                </RunSynchronousCommand>
                <RunSynchronousCommand wcm:action="add">
                    <Order>18</Order>
                    <Path>cmd.exe /c echo exit &gt;&gt; X:\diskpartUEFI.txt</Path>
                </RunSynchronousCommand>
                <RunSynchronousCommand wcm:action="add">
                    <Order>19</Order>
                    <Path>cmd.exe /c diskpart.exe /s X:\DiskPartUEFI.txt</Path>
                </RunSynchronousCommand>
            </RunSynchronous>
        </component>
    </settings>
    <settings pass="oobeSystem">
        <component name="Microsoft-Windows-International-Core" processorArchitecture="amd64" publicKeyToken="31bf3856ad364e35" language="neutral" versionScope="nonSxS" xmlns:wcm="http://schemas.microsoft.com/WMIConfig/2002/State" xmlns:xsi="http://www.w3.org/2001/XMLSchema-instance">
            <InputLocale>en-US</InputLocale>
            <SystemLocale>en-US</SystemLocale>
            <UILanguage>en-US</UILanguage>
            <UserLocale>en-US</UserLocale>
        </component>
        <component name="Microsoft-Windows-Shell-Setup" processorArchitecture="amd64" publicKeyToken="31bf3856ad364e35" language="neutral" versionScope="nonSxS" xmlns:wcm="http://schemas.microsoft.com/WMIConfig/2002/State" xmlns:xsi="http://www.w3.org/2001/XMLSchema-instance">
            <OOBE>
                <HideEULAPage>true</HideEULAPage>
                <HideOEMRegistrationScreen>true</HideOEMRegistrationScreen>
                <HideOnlineAccountScreens>true</HideOnlineAccountScreens>
                <HideWirelessSetupInOOBE>true</HideWirelessSetupInOOBE>
                <ProtectYourPC>1</ProtectYourPC>
                <UnattendEnableRetailDemo>false</UnattendEnableRetailDemo>
            </OOBE>
            <UserAccounts>
                <LocalAccounts>
                    <LocalAccount wcm:action="add">
                        <Password>
                            <Value>UABhAHMAcwB3AG8AcgBkADEAUABhAHMAcwB3AG8AcgBkAA==</Value>
                            <PlainText>false</PlainText>
                        </Password>
                        <DisplayName>Windows User</DisplayName>
                        <Group>Administrators</Group>
                        <Name>WinUser</Name>
                    </LocalAccount>
                </LocalAccounts>
            </UserAccounts>
            <TimeZone>Central Standard Time</TimeZone>
            <FirstLogonCommands>
                <SynchronousCommand wcm:action="add">
                    <CommandLine>reg add &quot;HKLM\SOFTWARE\Microsoft\Windows NT\CurrentVersion\Winlogon&quot; /v AutoLogonCount /t REG_DWORD /d 0 /f</CommandLine>
                    <Order>1</Order>
                </SynchronousCommand>
            </FirstLogonCommands>
            <AutoLogon>
                <Password>
                    <Value>UABhAHMAcwB3AG8AcgBkADEAUABhAHMAcwB3AG8AcgBkAA==</Value>
                    <PlainText>false</PlainText>
                </Password>
                <Username>WinUser</Username>
                <Enabled>true</Enabled>
                <LogonCount>1</LogonCount>
            </AutoLogon>
        </component>
    </settings>
    <settings pass="specialize">
        <component name="Microsoft-Windows-Shell-Setup" processorArchitecture="amd64" publicKeyToken="31bf3856ad364e35" language="neutral" versionScope="nonSxS" xmlns:wcm="http://schemas.microsoft.com/WMIConfig/2002/State" xmlns:xsi="http://www.w3.org/2001/XMLSchema-instance">
            <OEMInformation>
                <Manufacturer></Manufacturer>
                <SupportHours></SupportHours>
                <SupportPhone></SupportPhone>
                <SupportURL></SupportURL>
            </OEMInformation>
            <OEMName></OEMName>
            <TimeZone>Central Standard Time</TimeZone>
        </component>
    </settings>
    <cpi:offlineImage cpi:source="catalog://prime/my softwaremy data/01 - software/05 - windows images and deployment tools/03 - installation and deployment tools/catalog files for windows sim/windows 11 pro 24h2 catalog file/install_windows 11 pro.clg" xmlns:cpi="urn:schemas-microsoft-com:cpi" />
</unattend>
 

My Computers

System One System Two

  • OS
    Win11 Pro 24H2
    Computer type
    PC/Desktop
    Manufacturer/Model
    Self-built
    CPU
    Intel i7 11700K
    Motherboard
    ASUS Prime Z590-A MB
    Memory
    64GB (Waiting for warranty replacement of another 64GB for 128GB total)
    Graphics Card(s)
    No GPU - Built-in Intel Graphics
    Sound Card
    Integrated
    Monitor(s) Displays
    HP Envy 32
    Screen Resolution
    2560 x 1440
    Hard Drives
    1 x 1TB NVMe SSD
    1 x 2TB NVMe SSD
    1 x 4TB NVMe SSD
    3 x 512GB 2.5" SSD
    1 x 4TB 2.5" SSD
    5 x 8TB Seagate Barracuda HDD
    PSU
    Corsair HX850i
    Case
    Corsair iCUE RGB 5000X mid tower case
    Cooling
    Noctua NF-S12A chromax.black.swap case fans (Qty. 7) & Home Computer Specifications, Configuration, and Usage Notes General Specifications ASUS Prime Z590-A motherboard, serial number M1M0KC222467ARP Intel Core i7-11700K CPU (11th Gen Rocket Lake / LGA 1200 Socket) 128GB Crucial Ballistix RGB DDR4 3200 MHz DRAM (4 x 32GB) Corsair iCUE RGB 5000X mid tower case Noctua NH-D15 chromax.black CPU cooler Noctua NF-S12A chromax.black.swap case fans (Qty. 7) & Corsair LL-120 RGB Fans (Qty. 3)
    Keyboard
    Corsair K70 Max RGB Magnetic Keyboard
    Mouse
    Logitech MX Master 3
    Internet Speed
    1Gb Up / 1 Gb Down
    Browser
    Edge
    Antivirus
    Windows Defender
    Other Info
    The five 8TB drives and three 512GB SSDs are part of a DrivePool using StableBit DrivePool software. The three SSDs are devoted purely to caching for the 8TB drives. All of the important data is stored in triplicate so that I can withstand simultaneous failure of 2 disks.

    Networking: 2.5Gbps Ethernet and WiFi 6e
  • Operating System
    Win11 Pro 23H2
    Computer type
    Laptop
    Manufacturer/Model
    Lenovo ThinkBook 13x Gen 2
    CPU
    Intel i7-1255U
    Memory
    16 GB
    Graphics card(s)
    Intel Iris Xe Graphics
    Sound Card
    Realtek® ALC3306-CG codec
    Monitor(s) Displays
    13.3-inch IPS Display
    Screen Resolution
    WQXGA (2560 x 1600)
    Hard Drives
    2 TB 4 x 4 NVMe SSD
    PSU
    USB-C / Thunderbolt 4 Power / Charging
    Mouse
    Buttonless Glass Precision Touchpad
    Keyboard
    Backlit, spill resistant keyboard
    Internet Speed
    1Gb Up / 1Gb Down
    Browser
    Edge
    Antivirus
    Windows Defender
    Other Info
    WiFi 6e / Bluetooth 5.1 / Facial Recognition / Fingerprint Sensor / ToF (Time of Flight) Human Presence Sensor
@hsehestedt
Thank you for your help!
Currently I`m trying to use autounattend.xml file from this site:
And find which parameter from xml file is responsible for this window to appear:
More information about win24H2 and custom install.wim file i found here:
Will update, when find a solution.
While I have heard good things about that site for generating answer files, I have to admit that I roll my own just using the Windows System Image Manager. If you could post a copy of your answer file, I would be happy to take a stab at seeing if I can figure out what the problem is.

NOTE: I know that this can be resolved because I have all of my answer files working and I don't need to do anything like use the previous setup.

EDIT: I should add that mine are all working even for custom created sysprep images, again with no need to revert to the previous setup.
 

My Computers

System One System Two

  • OS
    Win11 Pro 24H2
    Computer type
    PC/Desktop
    Manufacturer/Model
    Self-built
    CPU
    Intel i7 11700K
    Motherboard
    ASUS Prime Z590-A MB
    Memory
    64GB (Waiting for warranty replacement of another 64GB for 128GB total)
    Graphics Card(s)
    No GPU - Built-in Intel Graphics
    Sound Card
    Integrated
    Monitor(s) Displays
    HP Envy 32
    Screen Resolution
    2560 x 1440
    Hard Drives
    1 x 1TB NVMe SSD
    1 x 2TB NVMe SSD
    1 x 4TB NVMe SSD
    3 x 512GB 2.5" SSD
    1 x 4TB 2.5" SSD
    5 x 8TB Seagate Barracuda HDD
    PSU
    Corsair HX850i
    Case
    Corsair iCUE RGB 5000X mid tower case
    Cooling
    Noctua NF-S12A chromax.black.swap case fans (Qty. 7) & Home Computer Specifications, Configuration, and Usage Notes General Specifications ASUS Prime Z590-A motherboard, serial number M1M0KC222467ARP Intel Core i7-11700K CPU (11th Gen Rocket Lake / LGA 1200 Socket) 128GB Crucial Ballistix RGB DDR4 3200 MHz DRAM (4 x 32GB) Corsair iCUE RGB 5000X mid tower case Noctua NH-D15 chromax.black CPU cooler Noctua NF-S12A chromax.black.swap case fans (Qty. 7) & Corsair LL-120 RGB Fans (Qty. 3)
    Keyboard
    Corsair K70 Max RGB Magnetic Keyboard
    Mouse
    Logitech MX Master 3
    Internet Speed
    1Gb Up / 1 Gb Down
    Browser
    Edge
    Antivirus
    Windows Defender
    Other Info
    The five 8TB drives and three 512GB SSDs are part of a DrivePool using StableBit DrivePool software. The three SSDs are devoted purely to caching for the 8TB drives. All of the important data is stored in triplicate so that I can withstand simultaneous failure of 2 disks.

    Networking: 2.5Gbps Ethernet and WiFi 6e
  • Operating System
    Win11 Pro 23H2
    Computer type
    Laptop
    Manufacturer/Model
    Lenovo ThinkBook 13x Gen 2
    CPU
    Intel i7-1255U
    Memory
    16 GB
    Graphics card(s)
    Intel Iris Xe Graphics
    Sound Card
    Realtek® ALC3306-CG codec
    Monitor(s) Displays
    13.3-inch IPS Display
    Screen Resolution
    WQXGA (2560 x 1600)
    Hard Drives
    2 TB 4 x 4 NVMe SSD
    PSU
    USB-C / Thunderbolt 4 Power / Charging
    Mouse
    Buttonless Glass Precision Touchpad
    Keyboard
    Backlit, spill resistant keyboard
    Internet Speed
    1Gb Up / 1Gb Down
    Browser
    Edge
    Antivirus
    Windows Defender
    Other Info
    WiFi 6e / Bluetooth 5.1 / Facial Recognition / Fingerprint Sensor / ToF (Time of Flight) Human Presence Sensor
So far, so new updates.
I`ve contact author of the site, that generates answer file - Christoph and he give me this advises:
- If I want to get old setup - Something in autounattend.xml prevents "Select setup option" screen (Previous Setup Version) · Issue #67 · cschneegans/unattend-generator
- Also his opinion about custom ISO images is: "Also note that I usually advise against using modified Windows images. Instead, I recommend to use a pristine image from Microsoft (such as Win11_24H2_English_x64.iso) and add custom scripts to the autounattend.xml to install software"
When I try to use notautounattend.xml and run manually autounattend.xml after old installation GUI start, i came to same problem: select operation system with no choose added.
So first I will check @hsehestedt advise how to repair this issue with old setup.
I will give more info about how do I prepare my custom iso file:
- I use clean Win11 24H2 ISO file from MS website as base;
- Install everything on VMware Workstation;
- Install windows without autounattend.xml file;
- Run %windir%\system32\sysprep\sysprep.exe /audit /reboot
- Install software that I want;
- Repair SYSPREP errors, by removing Microsoft.Ink.Handwriting packages;
- Generalize image and capture install.wim by this command: dism /Capture-Image /ImageFile:C:\install.wim /CaptureDir:E:\ /Name:windows11
- With AnyBurn I swap install.wim files and create new image;
- I`ve try setup with and without autounattend.xml file;
Every time setup goes at about 60% and stop with error, doesn`t matter if I use or not answer file;
So if I understand correctly if I use clean image from Windows website, I need to update all components and files, before sysprep custom iso file?
Also I send autounattend.xml file that use in my configuration.
 

Attachments

My Computer

System One

  • OS
    Windows 10
    Computer type
    Laptop
    Manufacturer/Model
    HP
    CPU
    AMD Ryzen 7 5800H
    Motherboard
    HP Victus by HP Laptop 16-e0xxx
    Memory
    64GB DDR4-3200
    Graphics Card(s)
    nVIDIA GeForce RTX 3060 Laptop
    Sound Card
    Realtek ALC245
I'll take a look at your answer file later - I have to get some sleep first. It's 0600 where I am and I have not yet slept :-)

QUESTION: Are you using only an autounattend.xml or also an unattend.xml answer file?

In the meantime, maybe I'm just not familiar with the process that you are using, but normally I do it a bit different. Please read as I note a few specifics you might look at:

Setup Windows up to the point in installation where OOBE is reached.
Press CTRL + SHIFT + F3 to enter audit mode.
Customize Windows - alter settings, install Win32 apps, etc.
Apply any needed assets such as the unattend.xml answer file.
Run sysprep /generalize /oobe
After sysprep, Windows will shutdown. Reboot system (or VM) from Win 11 install media making sure it cannot boot from HDD/SSD.
Capture the image

Note: When capturing the image, I notice that you specify a "NAME" but you should also specify a "DESCRIPTION". This was discussed in this very thread. There are times you may get away with this, but it would be a good habit to always include both NAME and DESCRIPTION, because in some scenarios it is absolutely necessary.

Replace the original install.wim with the newly captured install.wim.
Place autounattend.xml answer file in root of installation media.
 

My Computers

System One System Two

  • OS
    Win11 Pro 24H2
    Computer type
    PC/Desktop
    Manufacturer/Model
    Self-built
    CPU
    Intel i7 11700K
    Motherboard
    ASUS Prime Z590-A MB
    Memory
    64GB (Waiting for warranty replacement of another 64GB for 128GB total)
    Graphics Card(s)
    No GPU - Built-in Intel Graphics
    Sound Card
    Integrated
    Monitor(s) Displays
    HP Envy 32
    Screen Resolution
    2560 x 1440
    Hard Drives
    1 x 1TB NVMe SSD
    1 x 2TB NVMe SSD
    1 x 4TB NVMe SSD
    3 x 512GB 2.5" SSD
    1 x 4TB 2.5" SSD
    5 x 8TB Seagate Barracuda HDD
    PSU
    Corsair HX850i
    Case
    Corsair iCUE RGB 5000X mid tower case
    Cooling
    Noctua NF-S12A chromax.black.swap case fans (Qty. 7) & Home Computer Specifications, Configuration, and Usage Notes General Specifications ASUS Prime Z590-A motherboard, serial number M1M0KC222467ARP Intel Core i7-11700K CPU (11th Gen Rocket Lake / LGA 1200 Socket) 128GB Crucial Ballistix RGB DDR4 3200 MHz DRAM (4 x 32GB) Corsair iCUE RGB 5000X mid tower case Noctua NH-D15 chromax.black CPU cooler Noctua NF-S12A chromax.black.swap case fans (Qty. 7) & Corsair LL-120 RGB Fans (Qty. 3)
    Keyboard
    Corsair K70 Max RGB Magnetic Keyboard
    Mouse
    Logitech MX Master 3
    Internet Speed
    1Gb Up / 1 Gb Down
    Browser
    Edge
    Antivirus
    Windows Defender
    Other Info
    The five 8TB drives and three 512GB SSDs are part of a DrivePool using StableBit DrivePool software. The three SSDs are devoted purely to caching for the 8TB drives. All of the important data is stored in triplicate so that I can withstand simultaneous failure of 2 disks.

    Networking: 2.5Gbps Ethernet and WiFi 6e
  • Operating System
    Win11 Pro 23H2
    Computer type
    Laptop
    Manufacturer/Model
    Lenovo ThinkBook 13x Gen 2
    CPU
    Intel i7-1255U
    Memory
    16 GB
    Graphics card(s)
    Intel Iris Xe Graphics
    Sound Card
    Realtek® ALC3306-CG codec
    Monitor(s) Displays
    13.3-inch IPS Display
    Screen Resolution
    WQXGA (2560 x 1600)
    Hard Drives
    2 TB 4 x 4 NVMe SSD
    PSU
    USB-C / Thunderbolt 4 Power / Charging
    Mouse
    Buttonless Glass Precision Touchpad
    Keyboard
    Backlit, spill resistant keyboard
    Internet Speed
    1Gb Up / 1Gb Down
    Browser
    Edge
    Antivirus
    Windows Defender
    Other Info
    WiFi 6e / Bluetooth 5.1 / Facial Recognition / Fingerprint Sensor / ToF (Time of Flight) Human Presence Sensor
New Setup will automatically create an empty \Windows.old (even on a wiped disk). If you don't remove this before DISM capture, Windows gets annoyed at install time.
 

My Computer

System One

  • OS
    Windows 7

Latest Support Threads

Latest Tutorials

Back
Top Bottom